
Are you running Proxmox 5.1 or later? Use my current instructions here instead, this guide is only for 5.0.
This tutorial for installing macOS Sierra has been adapted for Proxmox 5.0 (not any later version like 5.1!) from Kholia’s GitHub project for installing into vanilla KVM. There is more documentation there which will help out with enabling extra features and diagnosing problems!
Requirements
I’ll assume you already have Proxmox 5.0 installed. You also need a real Mac available in order to download High Sierra from the App Store and build the installation ISO. Your Proxmox host computer must have an Intel CPU at least as new as Penryn (I believe you would need a a custom Mac kernel in order to use an AMD CPU).
First step: Create an installation ISO
On a Mac machine, download the macOS High Sierra installer from the App Store (this will download it into your Applications folder).
Check the size of the completed download. Some people will end up with a 16MB installer, and some will receive the full 5GB installer (nobody knows why yet). If you received the 16MB version, follow the instructions here to get the full 5GB version instead.
Now run this script in order to create HighSierra.iso from the installer. The ISO should get saved to your desktop. Upload the ISO to your Proxmox server’s ISO store (typically /var/lib/vz/template/iso).
Prepare a Clover image
We’ll be using Clover as a bootloader for High Sierra.
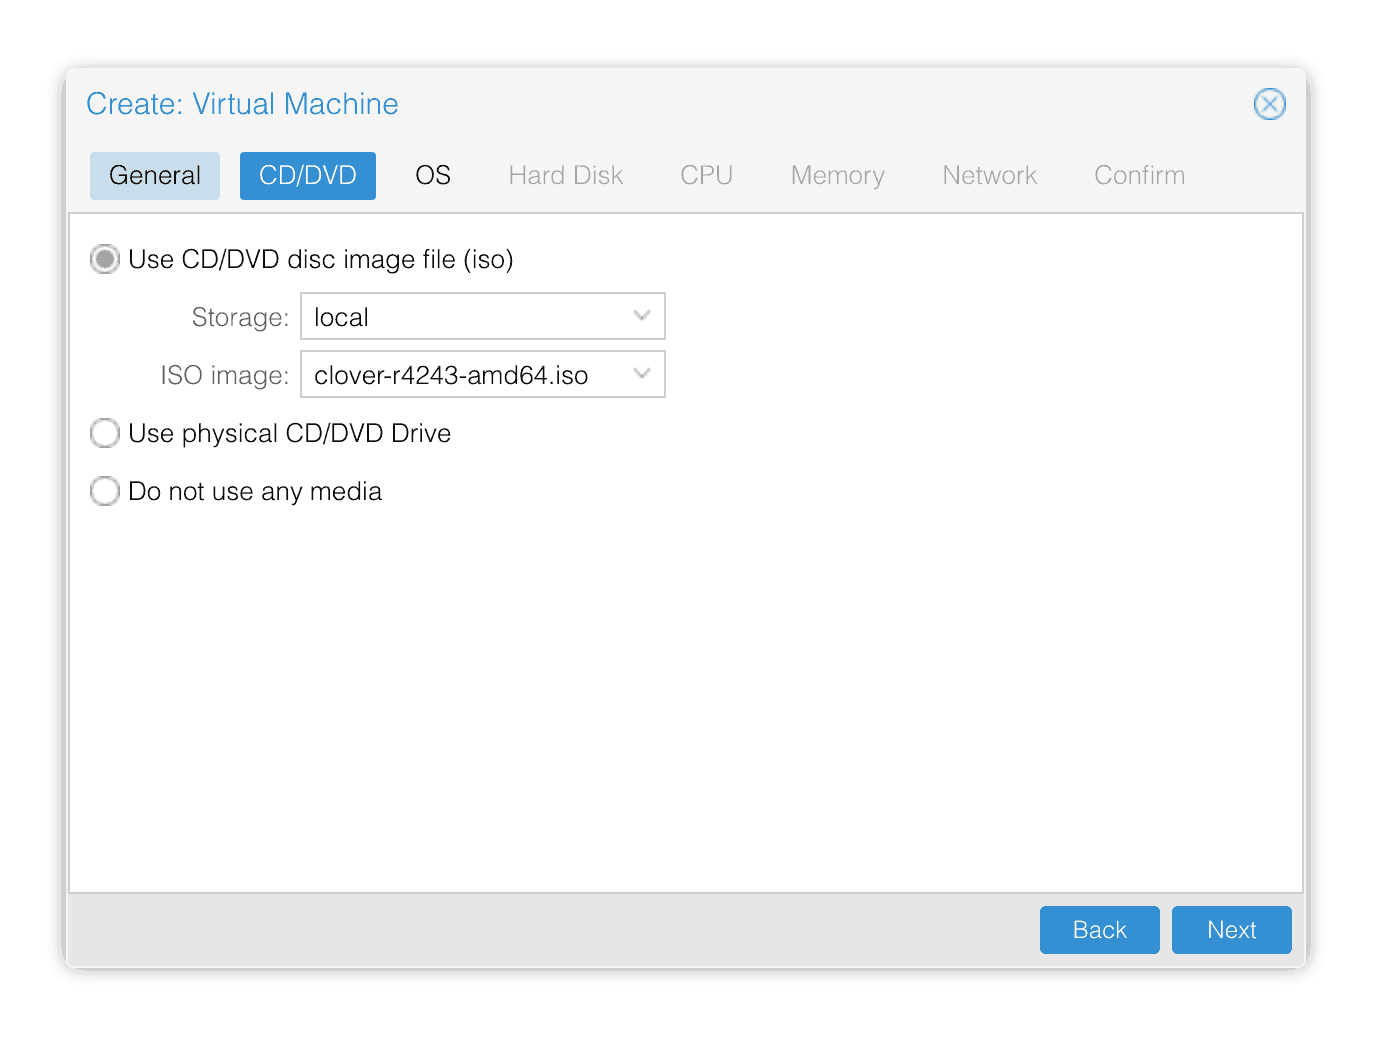
Download this Clover disk image (that I built using kholia’s build script from Clover r4243), unpack it, and upload it to Proxmox’s ISO store at /var/lib/vz/template/iso. Although it has a .iso file extension, this is actually a hard disk image. (I do it this way because Proxmox has nicer tools for storing and picking .iso files for us)
Fetch the OSK authentication key
macOS checks that it is running on real Mac hardware, and refuses to boot on third-party hardware. You can get around this by reading an authentication key out of your real Mac hardware (the OSK key). Run the first bit of C code from this page (you’ll need XCode installed) and it’ll print out the 64 character OSK for you. Make a note of it.
Every Mac uses the same OSK, so don’t be surprised if it doesn’t look like a random string!
Create the VM
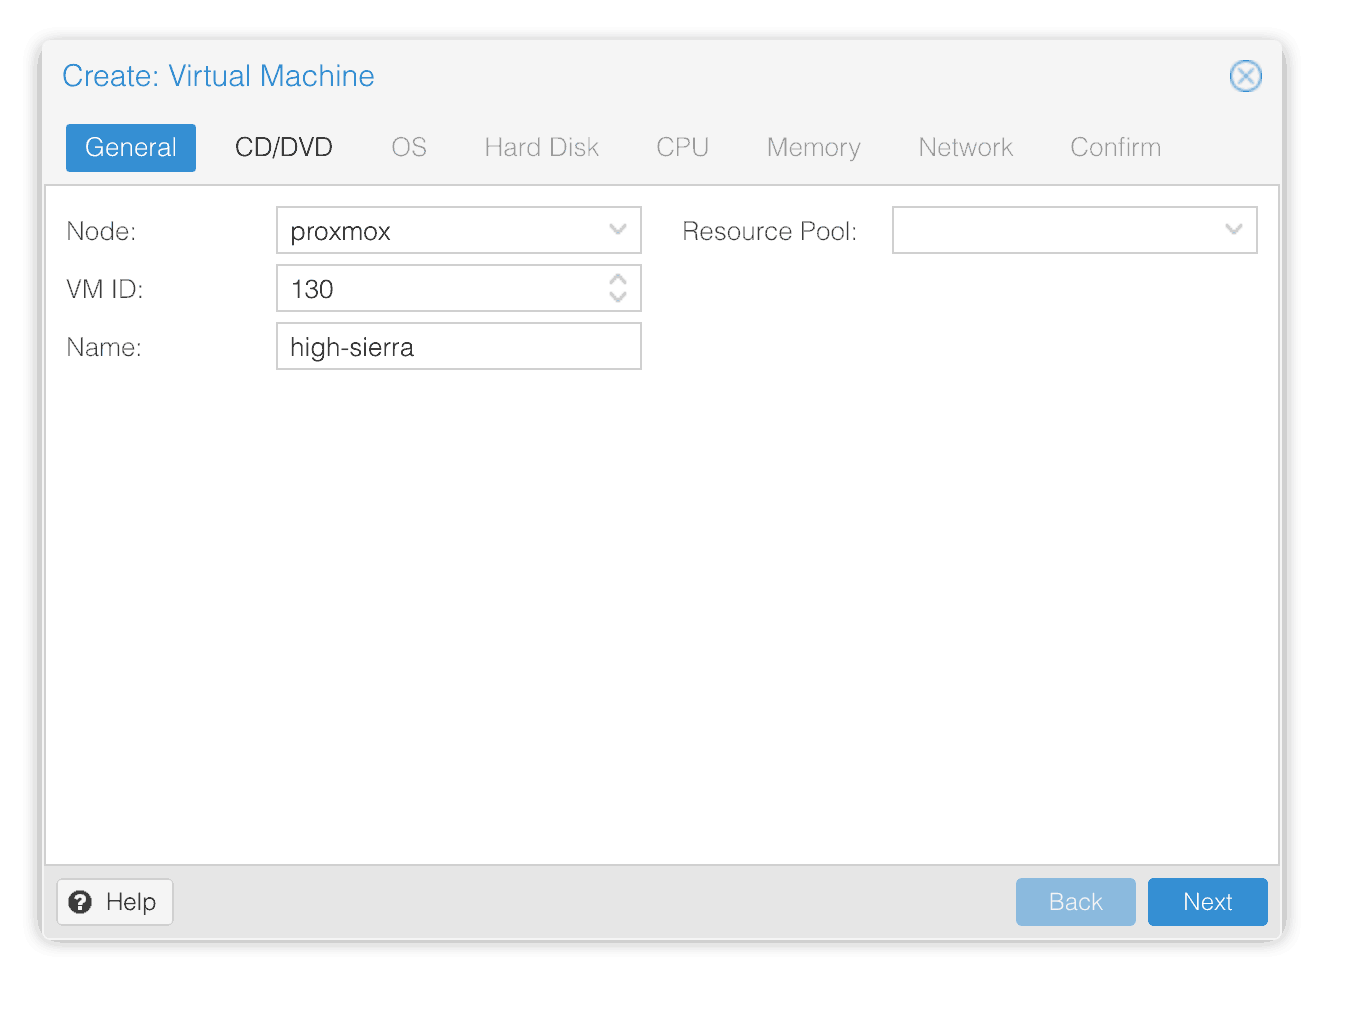
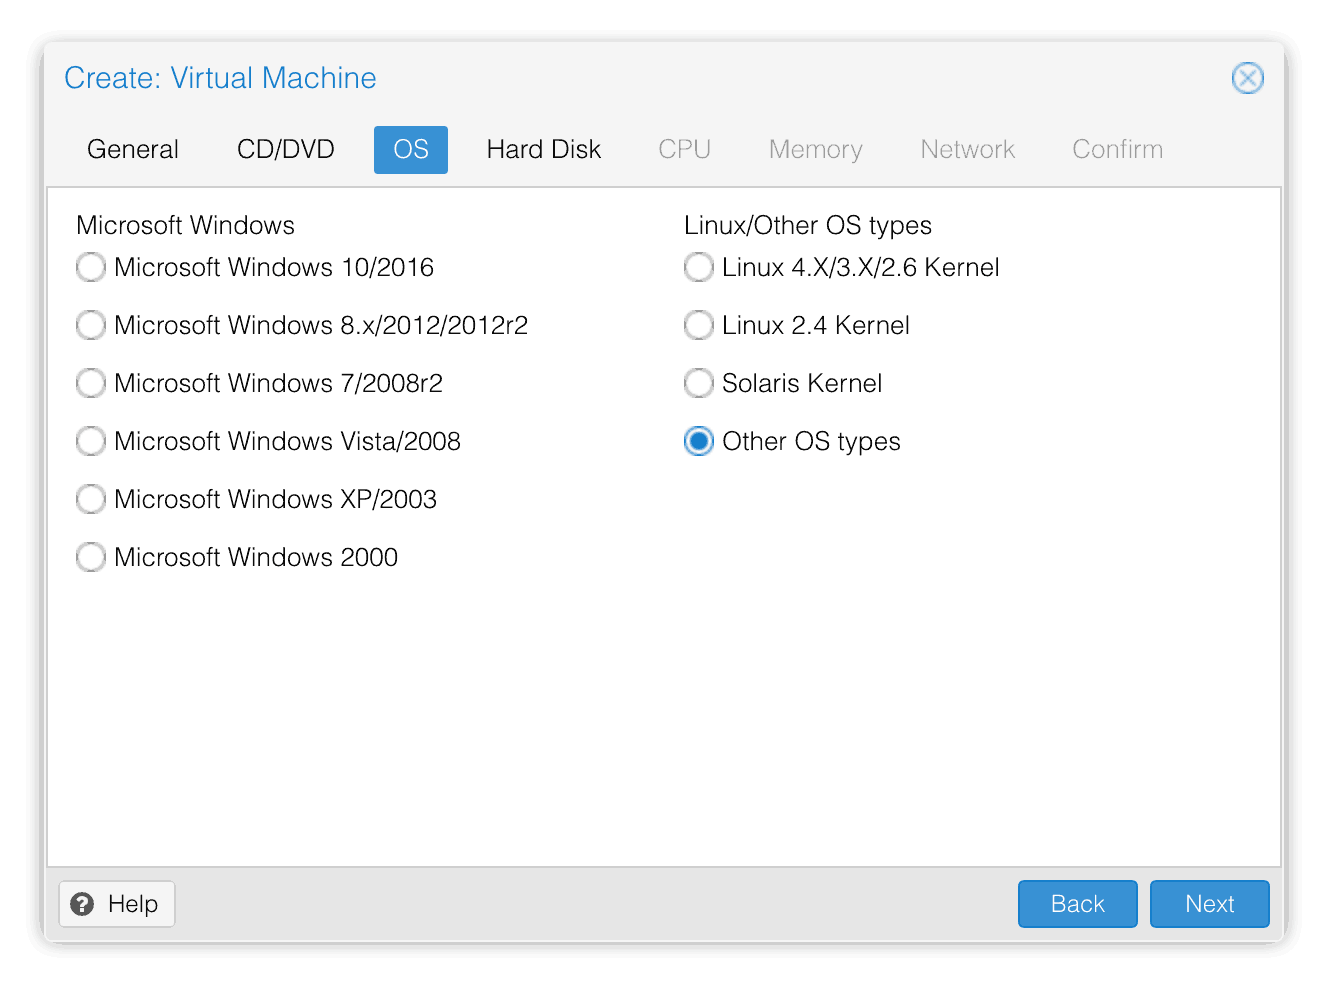
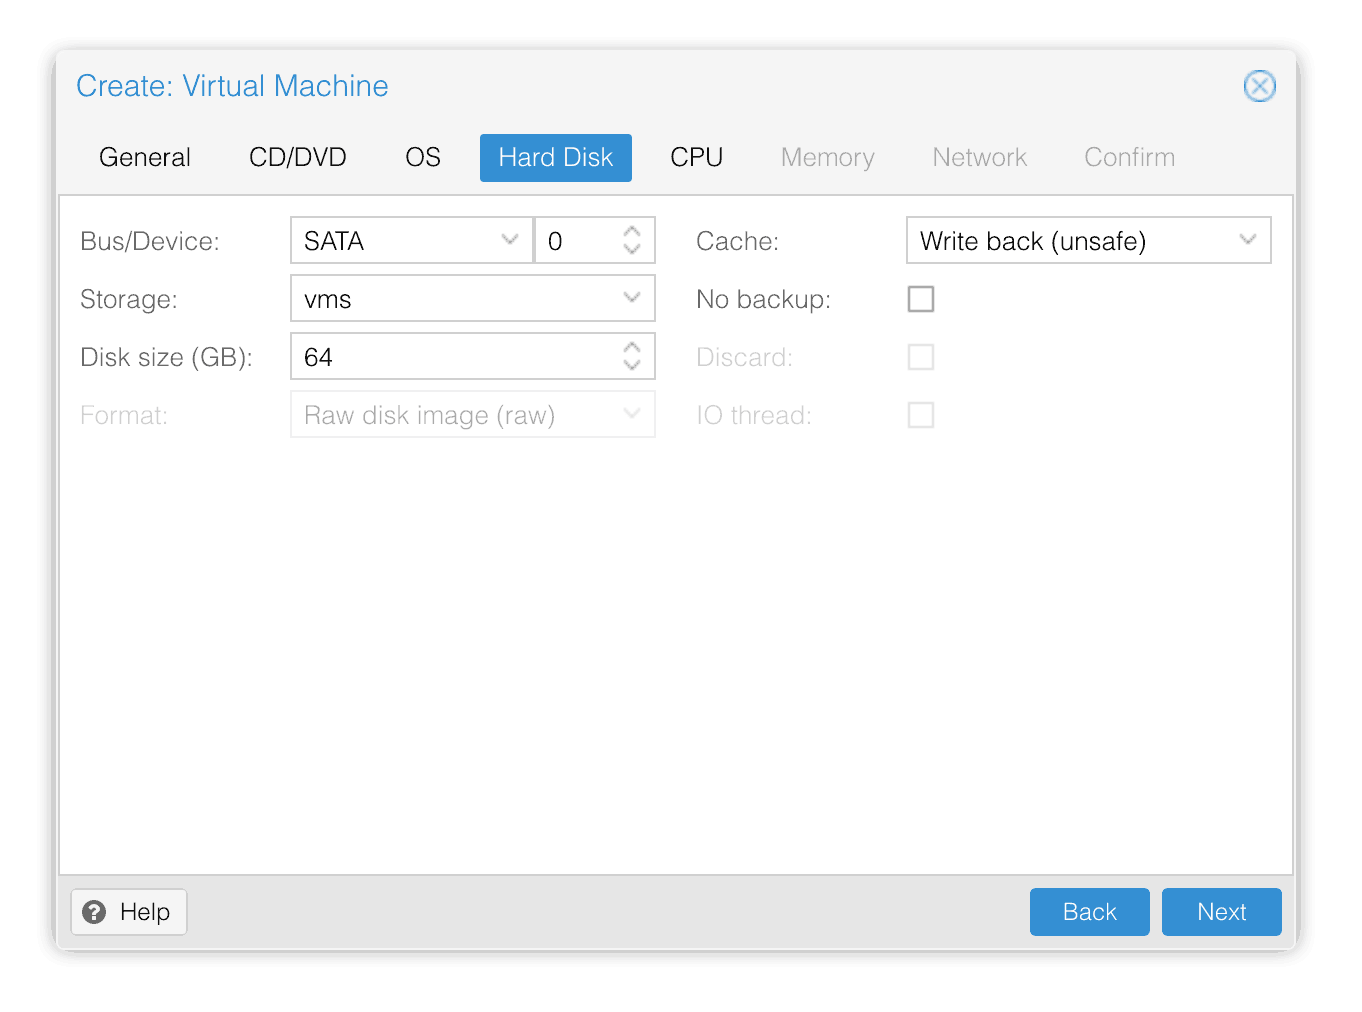
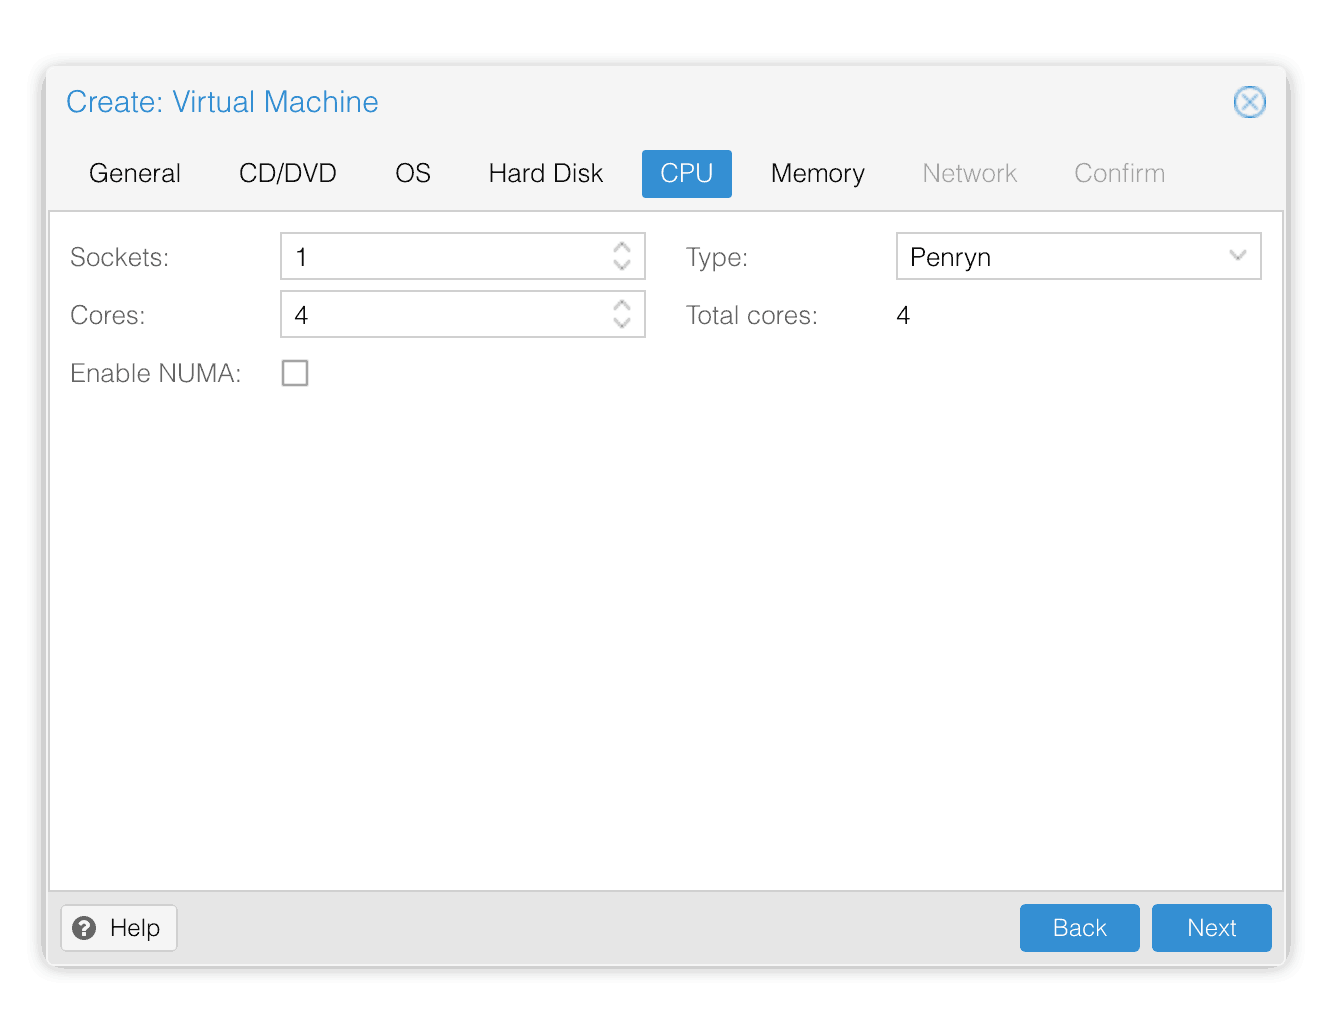
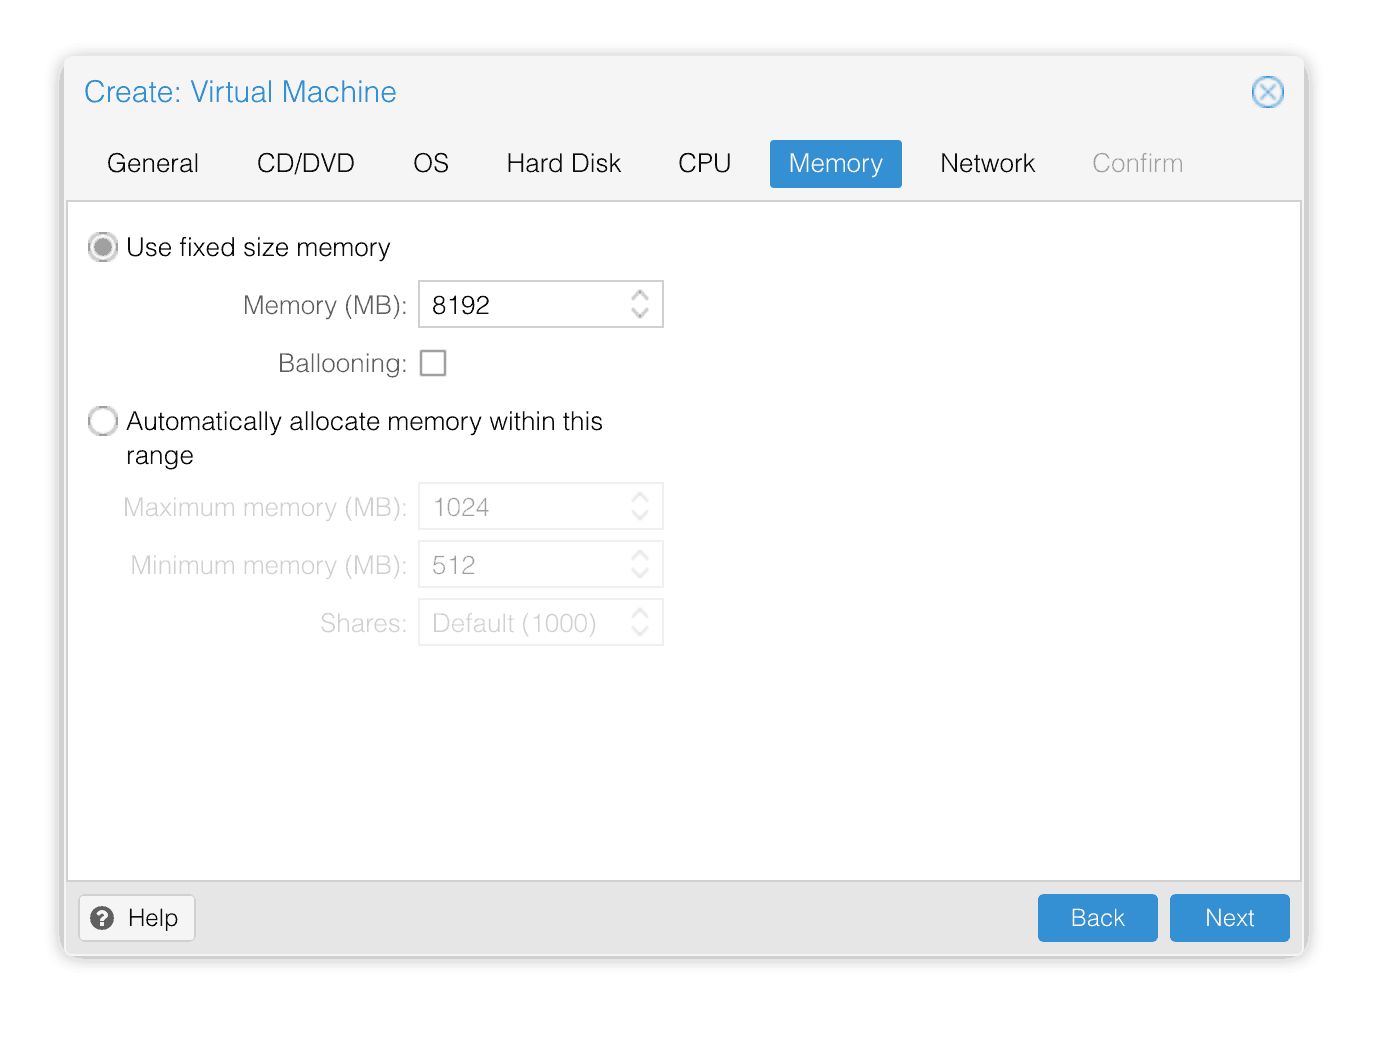
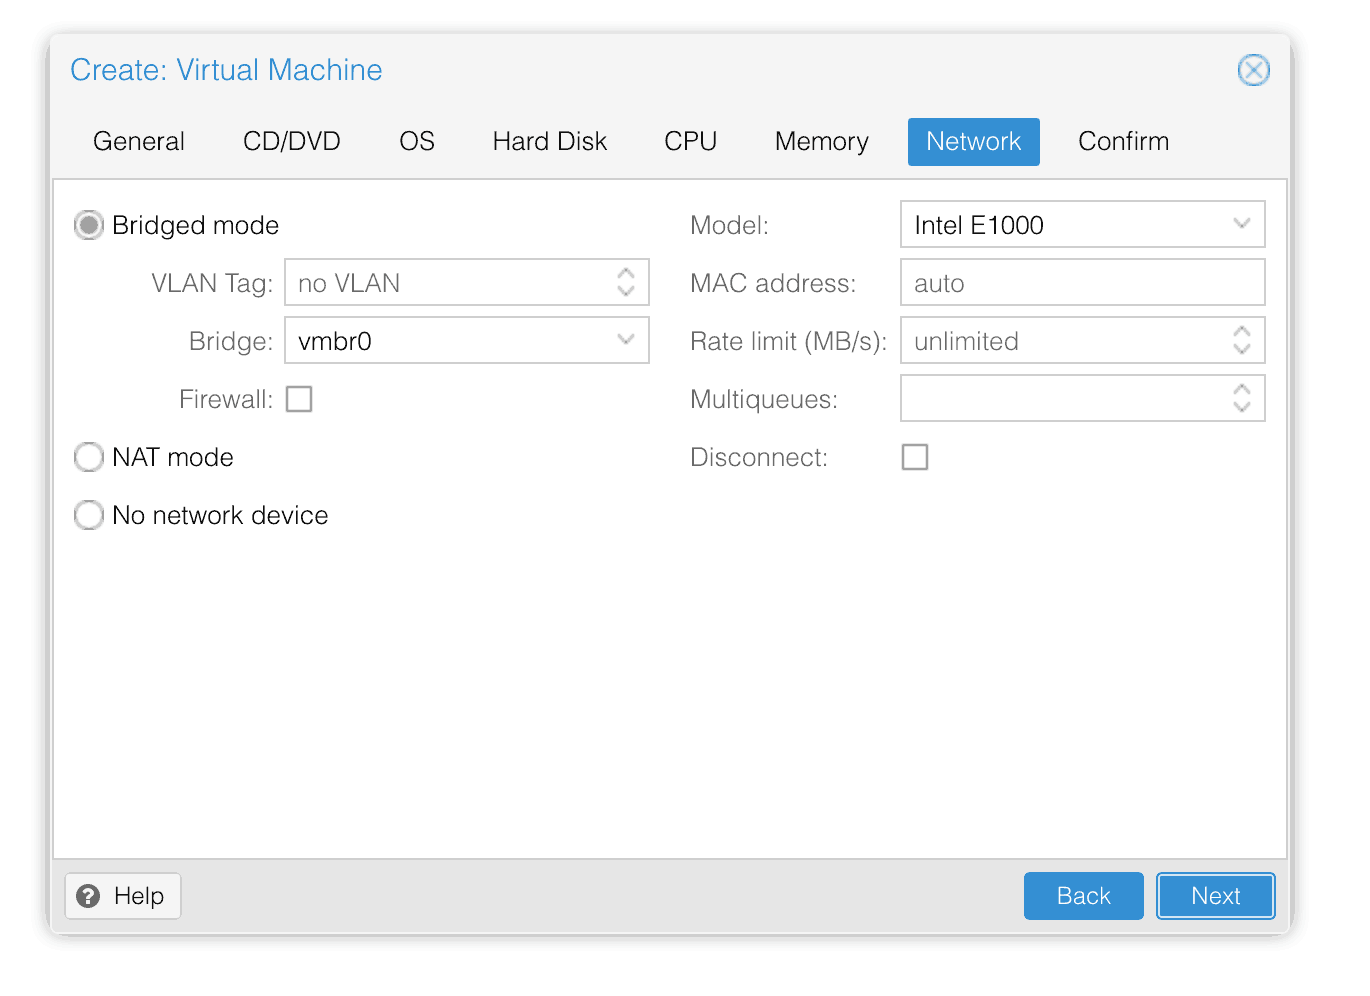
From the Proxmox web UI, create a new virtual machine as shown below.
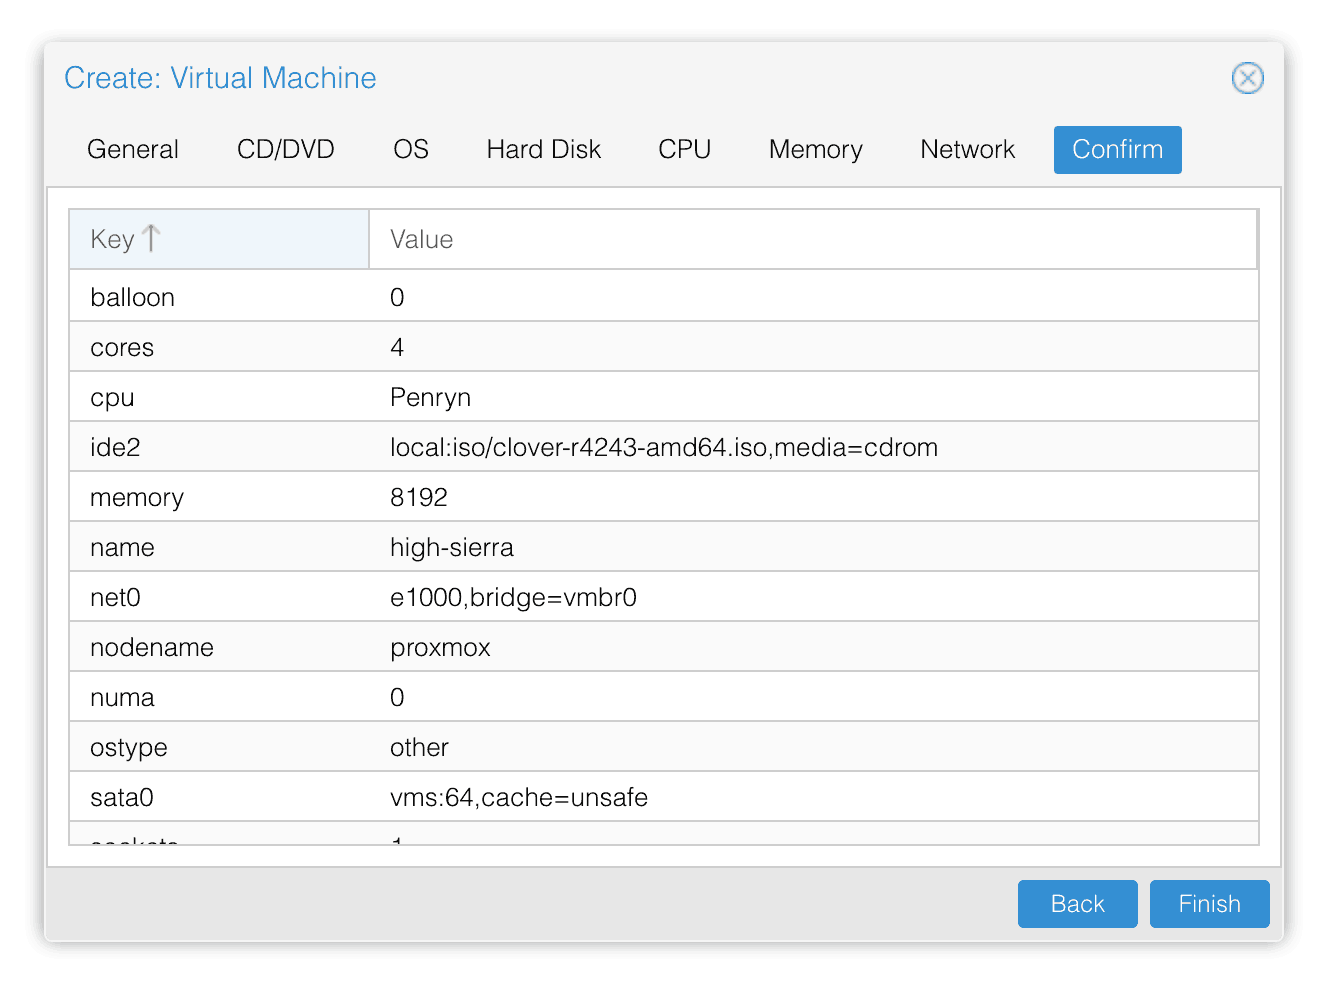
In the Options page for the VM, change “Use tablet for pointer” to “No”. Change “BIOS” to “OVMF (UEFI)”.
In the Hardware page for the VM, change the the Display to Standard VGA (std). Add a second DVD drive at IDE0, set it to use your HighSierra.iso. Add an “EFI Disk” too.
Don’t try to start the VM just yet. First, SSH into your Proxmox server so we can make some edits to the configuration files.
Edit /etc/pve/qemu-server/YOUR-VM-ID-HERE.conf (with nano or vim). Add these two lines, being sure to subtitute the OSK you extracted earlier into the right place:
machine: pc-q35-2.9
args: -device isa-applesmc,osk="THE-OSK-YOU-EXTRACTED-GOES-HERE" -smbios type=2 -cpu Penryn,kvm=on,vendor=GenuineIntel,+invtsc,vmware-cpuid-freq=on
Find the two lines that define the CDROM drives (ide0 and ide2), and remove the “,media=cdrom” part from both lines. Add “,cache=unsafe” in its place. If the Sierra boot option doesn’t appear in Clover later, try adding “,media=cdrom” back to the line for the Sierra ISO.
On the net0 line, change “e1000” to “e1000-82545em”. This variant is supported by OS X.
macOS doesn’t support the PS2 keyboard and mouse that QEMU will emulate, nor does it support the tablet, so edit /usr/share/qemu-server/pve-q35.cfg and add these USB input devices to the bottom of the file instead:
[device "mouse1"]
 driver = "usb-mouse"
 bus = "ehci.0"
 port = "1"

[device "keyboard1"]
 driver = "usb-kbd"
 bus = "ehci.0"
 port = "2"
We’ve added those to the config file instead of to the VM’s args directly. If we were to add them to the VM’s args, then when Proxmox constructs its call to KVM to launch the VM, those device definitions would appear before the pve-q35.cfg file is included, which defines the USB busses. However, the device definitions must appear after the definitions of the USB bus that they refer to.
Note that this file is whitespace-sensitive, make you you don’t add any blank lines that have extraneous spaces on them.
Return to the Options tab and change the boot order to put IDE2 (the Clover image) first.
Configure Proxmox
On Proxmox, run “echo 1 > /sys/module/kvm/parameters/ignore_msrs” to avoid a bootloop during macOS boot. To make this change persist across Proxmox reboots, run:
echo "options kvm ignore_msrs=Y" >>/etc/modprobe.d/kvm.conf && update-initramfs -k all -u
You must now install a patched version of Proxmox’s QEMU in order to be able to boot High Sierra, until this patch is merged by the upstream.
Install High Sierra
Now start up your VM.
Go to the Console tab, quickly hit Escape at the Proxmox logo to enter the OVMF configuration. If your keyboard doesn’t work, leave the Console tab, stop the VM, start the VM, then re-enter the console tab.
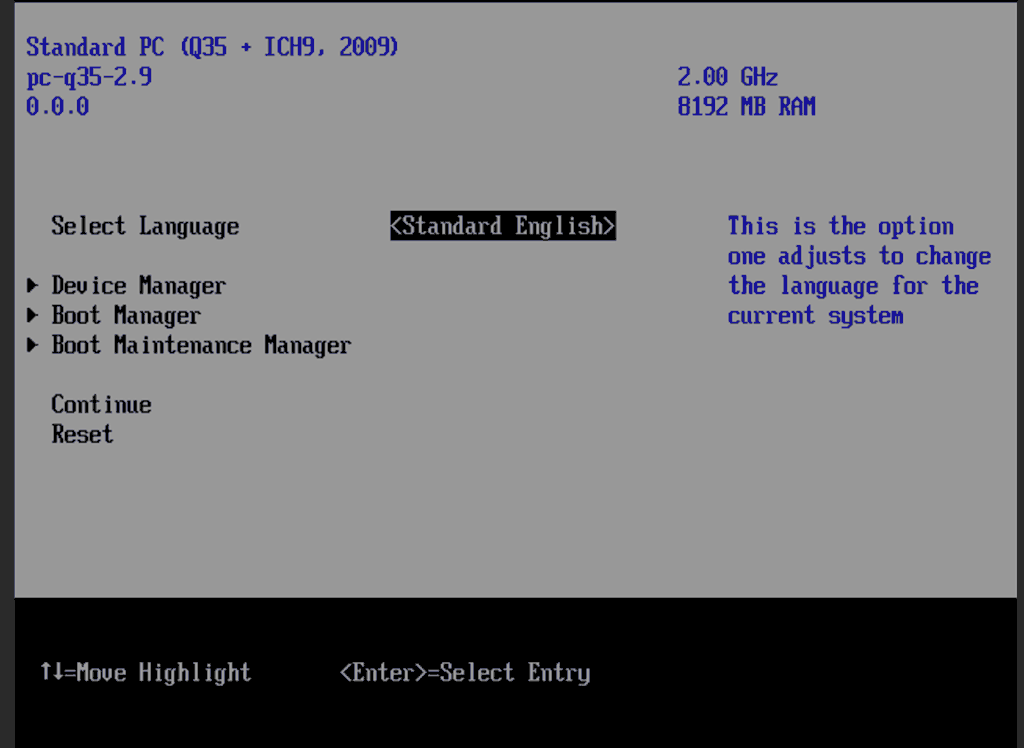
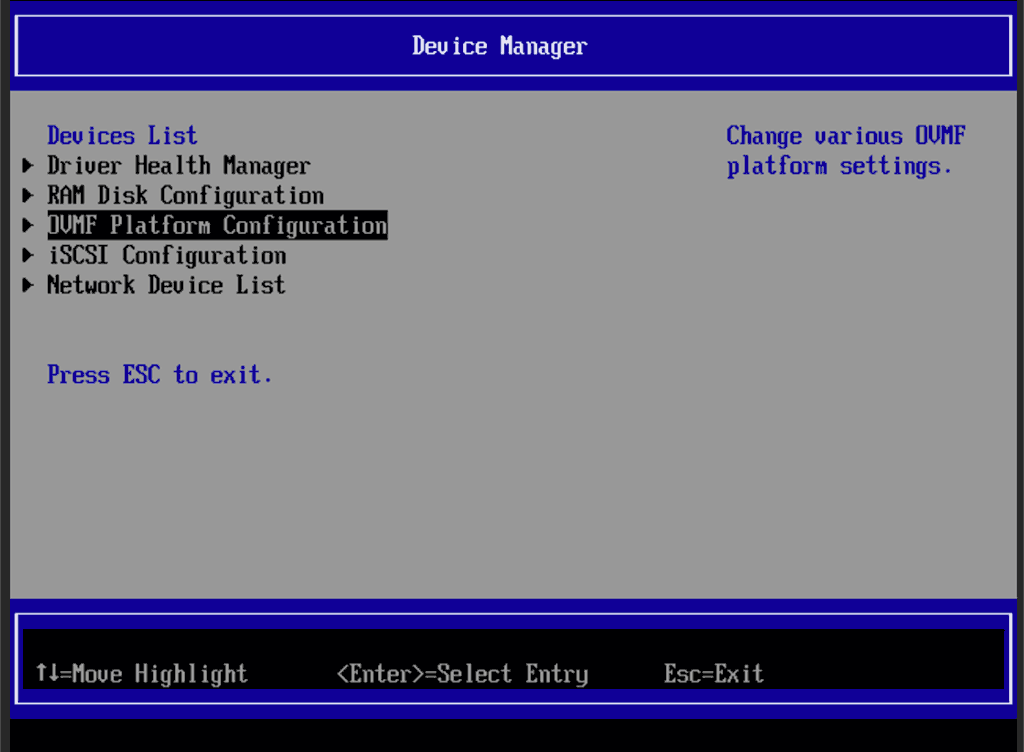
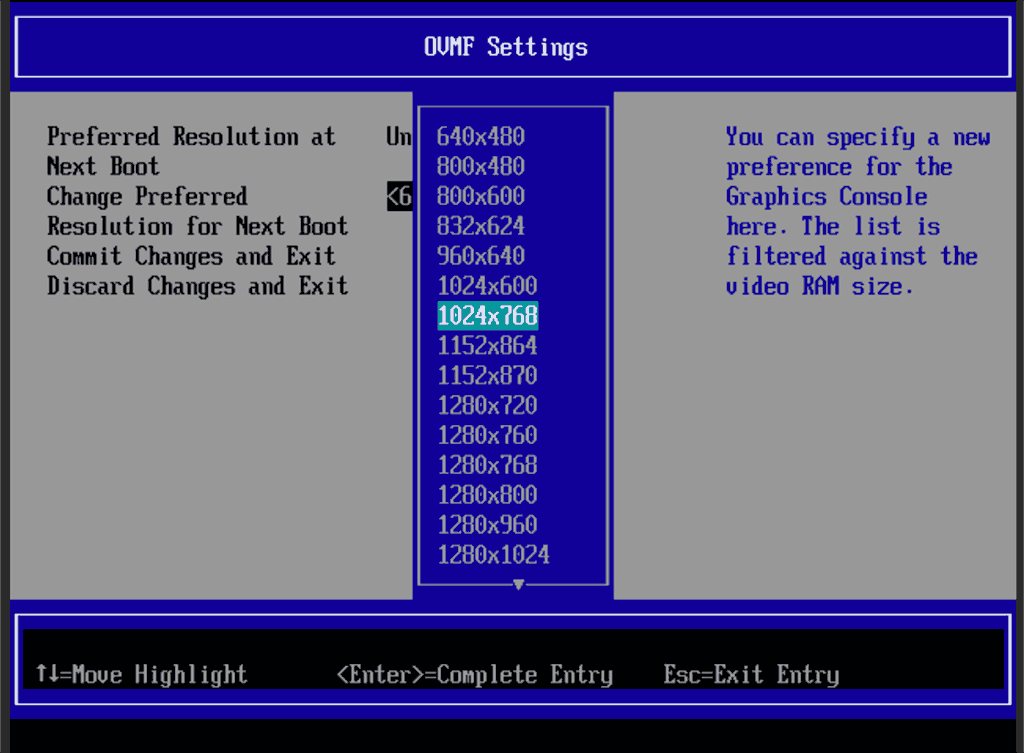
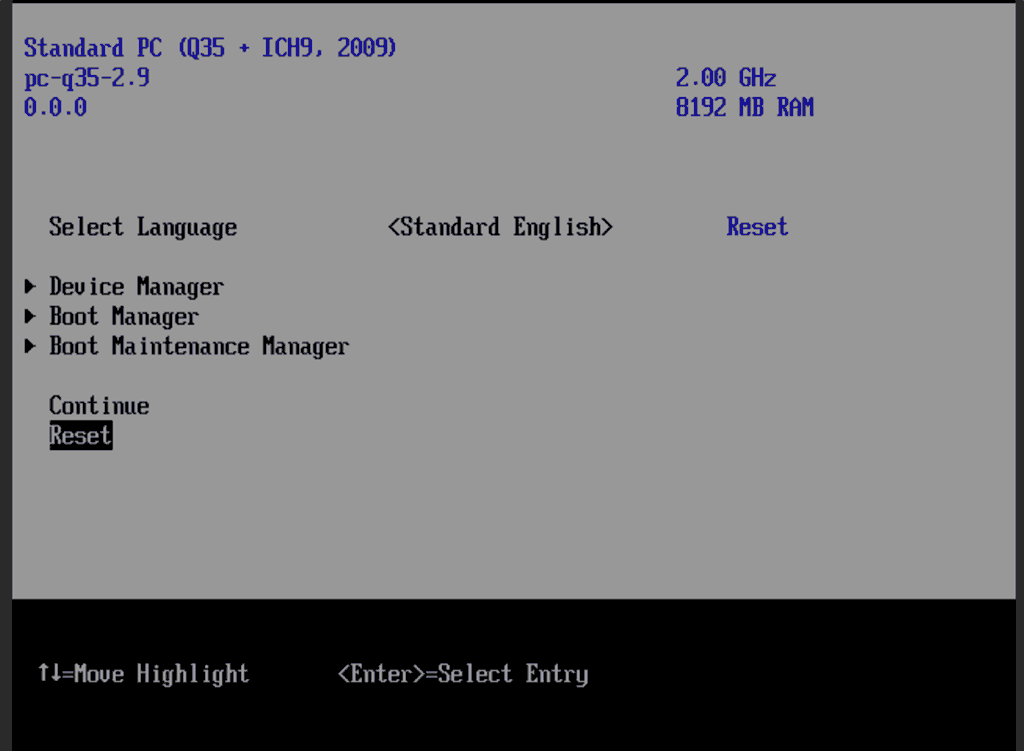
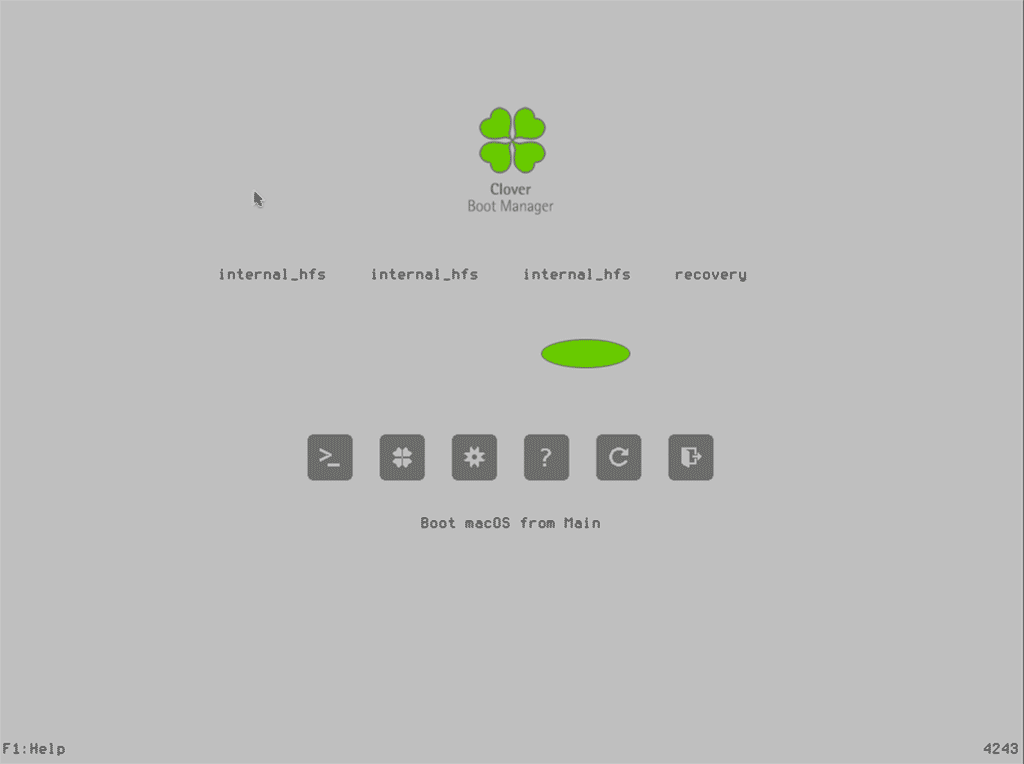
Follow the steps above to set the screen resolution to 1024×768 and “reset” to apply the new settings (not “continue”). This step is required to avoid scrambled graphics (Clover resolution must match OVMF resolution). It should now boot into Clover.
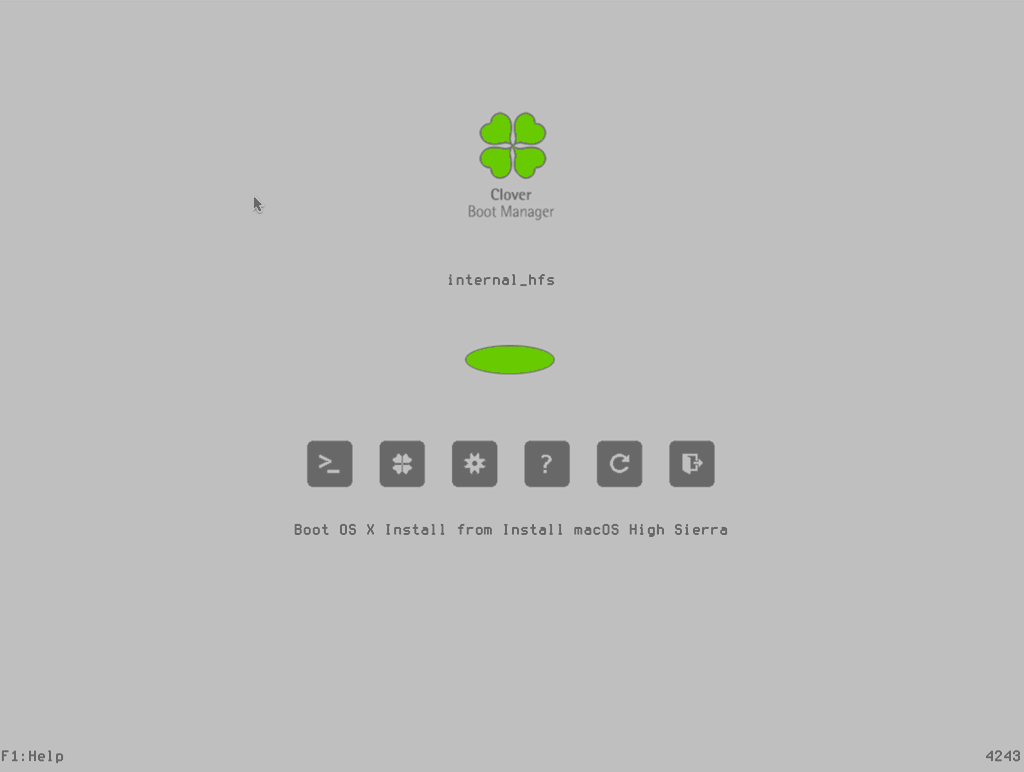
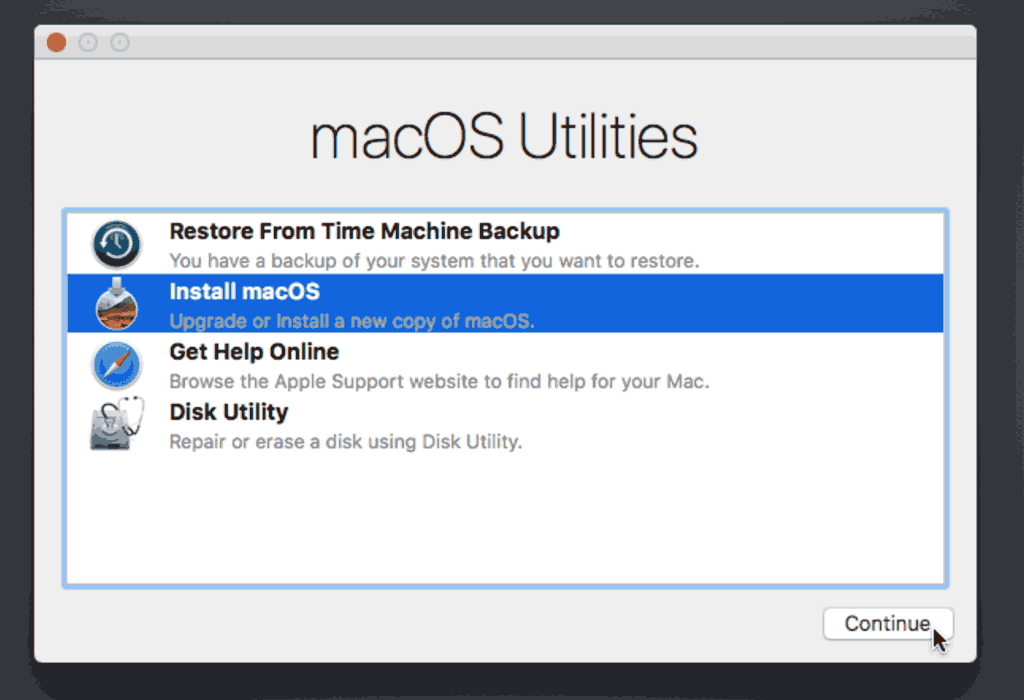
Press enter to boot the “Boot OS X Install from Install macOS High Sierra” entry and the installer should appear. Choose your language.
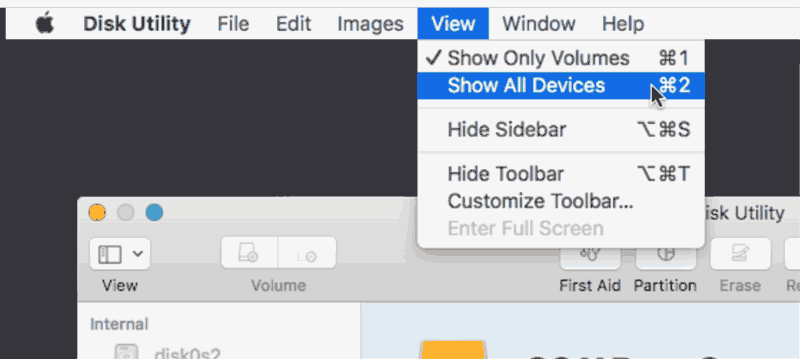
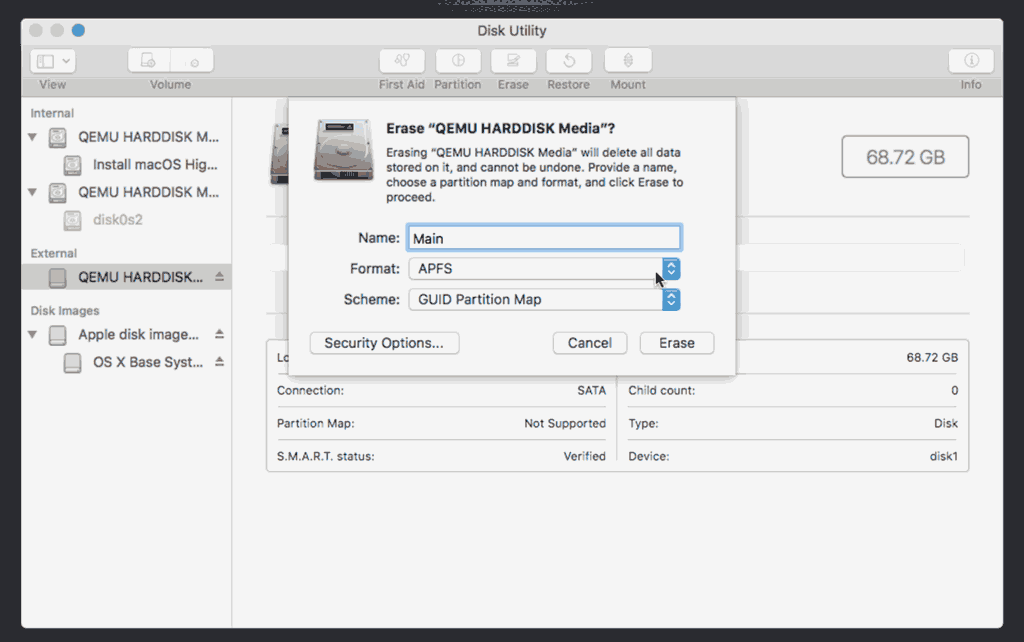
Our virtual hard drive needs to be erased/formatted before we can install to it, so select the Disk Utility option. Follow the steps below to format the disk:


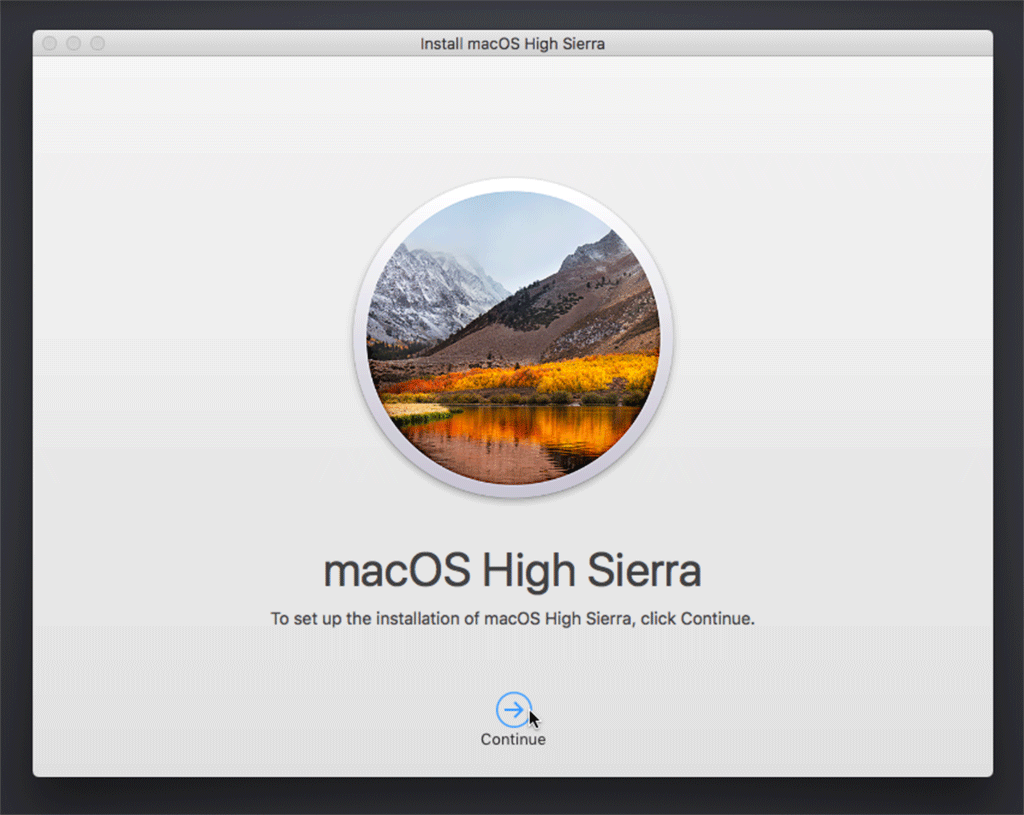
Now we’re ready to begin installation!
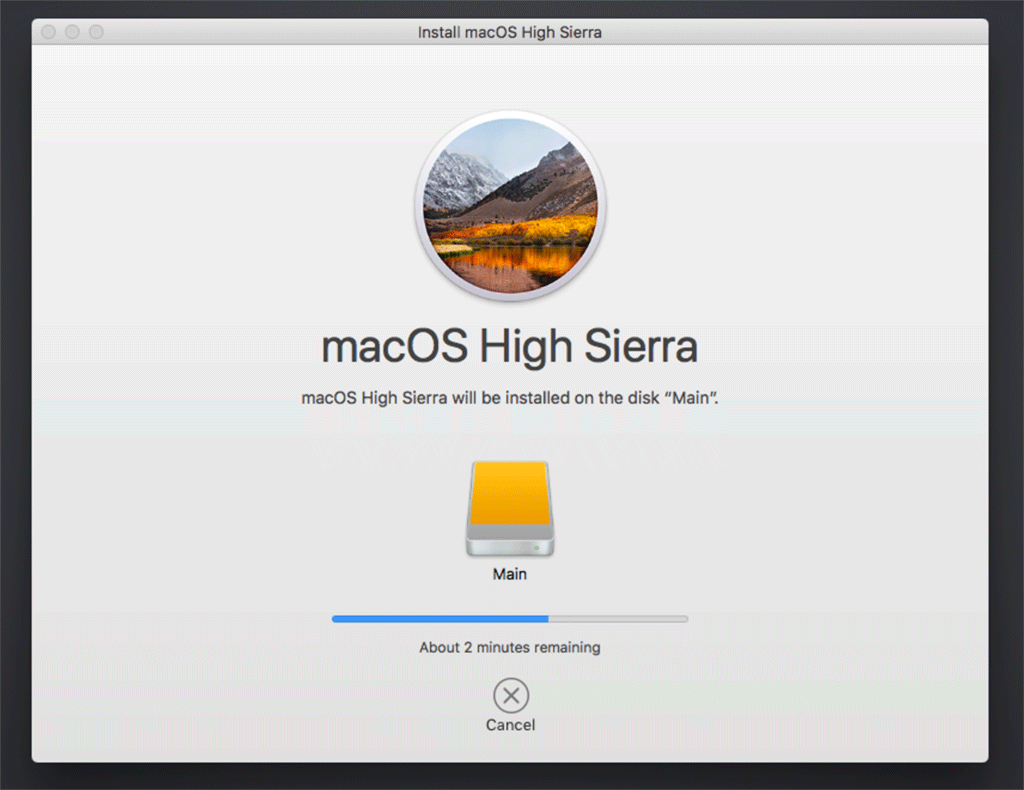
After the first stage of installation, the VM should reboot itself and continue installation by booting from the hard drive. Answer the initial install questions, and you’ll be logged on! (Note that you’ll probably want to hold off on logging into your iCloud account until you’ve configured your SMBIOS to your liking in Clover Configurator)
Make the Clover install permanent
We’re currently booting using Clover from the attached CD image. Let’s install that to the hard drive instead. Pop open Terminal and run “diskutil list” to see what drives we have available.
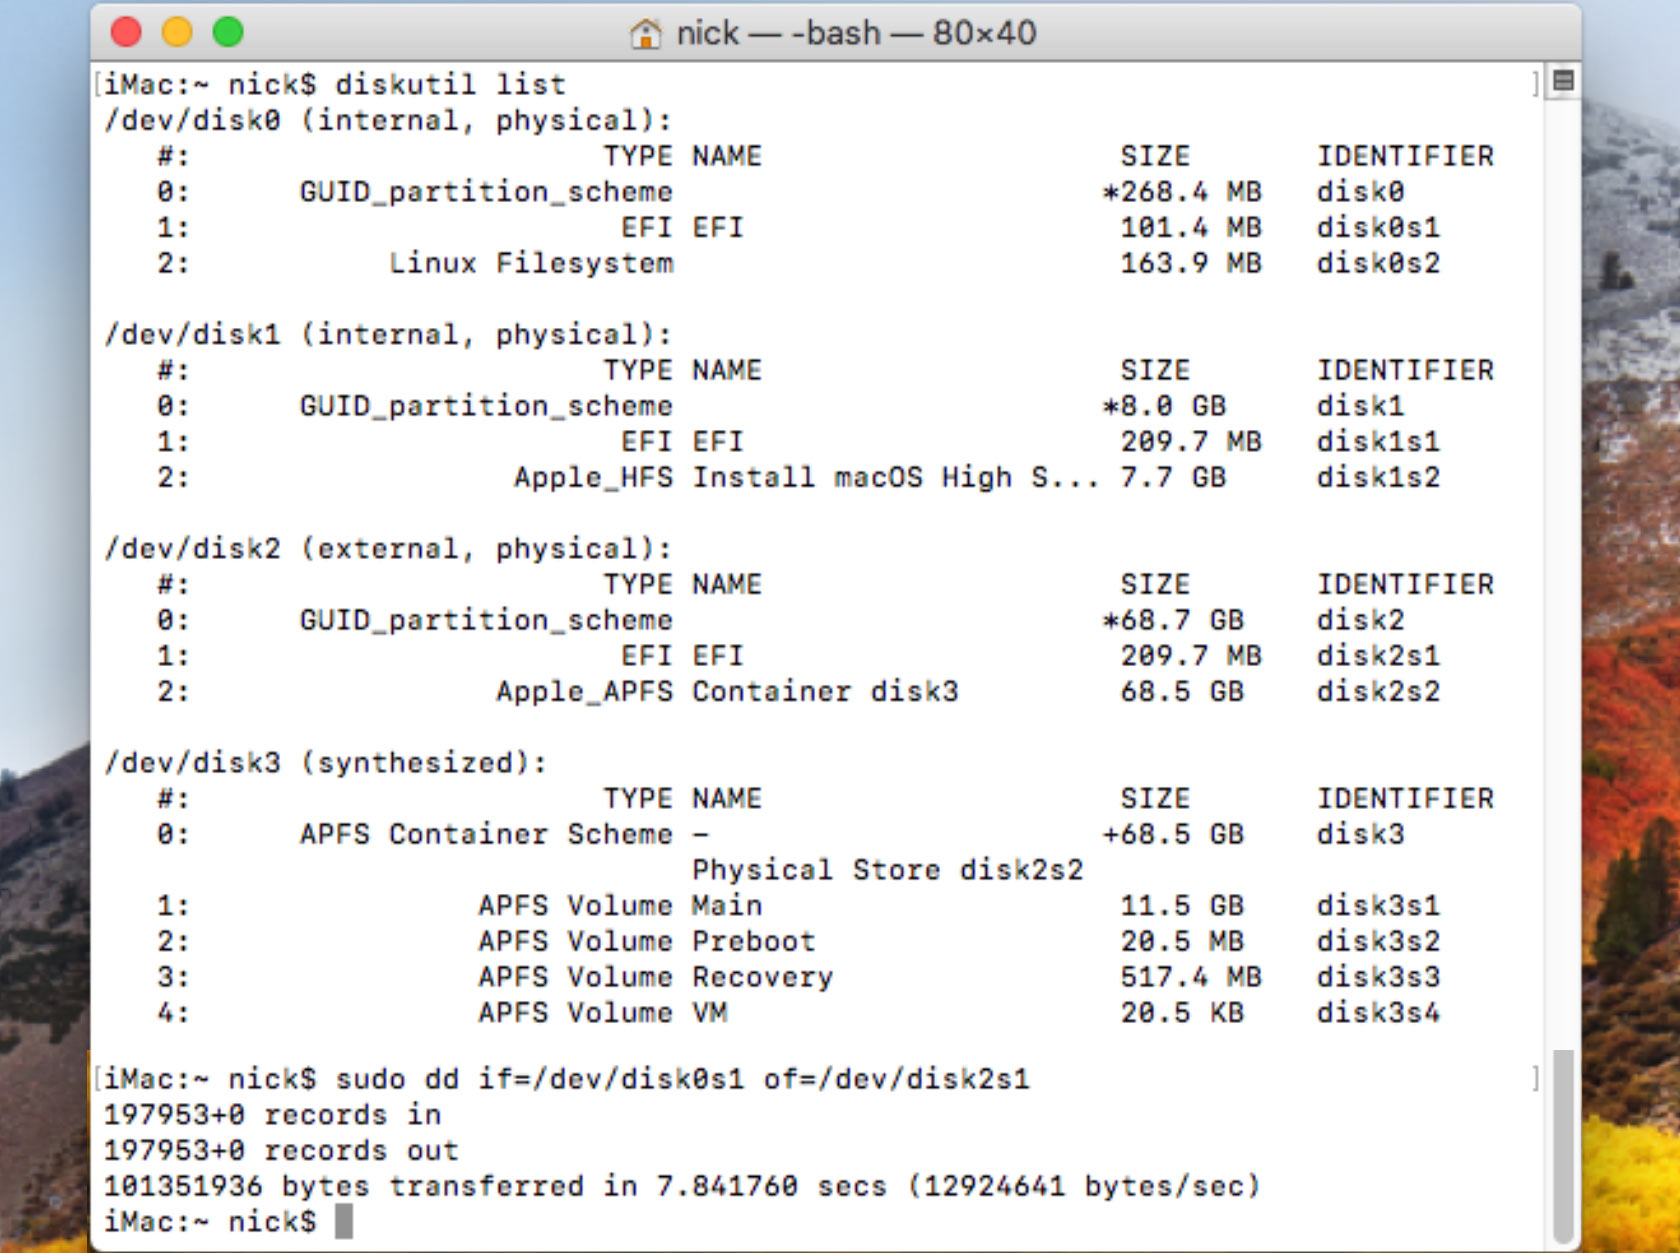
Use “sudo dd if=source of=dest” to copy the EFI partition from the Clover CD and overwrite the EFI partition on the hard disk. The Clover CD is the one with the “linux filesystem” on it, and the main hard disk is the one with the large Apple_APFS container partition on it.
In my case these EFI partitions ended up being called disk0s1 and disk2s1 respectively, so I ran “sudo dd if=/dev/disk0s1 of=/dev/disk2s1” (N.B. if you get these names wrong, you will erase the wrong disk and you’ll have to start the installation over again!).
Now shut down the VM, and remove both the Clover and the Sierra CDROM drives from the Hardware tab. On the Options tab, edit the boot order to place SATA0 as the first disk. Boot up. If everything went well, you should see a Clover boot menu, and you can select “boot macOS from *disk*” to boot High Sierra.
Sleep management
I found that I was unable to wake High Sierra from sleep using my mouse or keyboard. You can either disable system sleep in High Sierra’s Energy Saver settings to avoid this, or you can manually wake the VM up from sleep from Proxmox by running:
qm monitor YOUR-VM-ID-HERE
system_wakeup
quit
Editing your Clover/EFI settings
You can use the Clover Configurator tool to edit your Clover configuration, which is stored in the hard drive’s EFI partition. This tool should mount the EFI partition for you. If you want to mount it without using Clover Configurator, first check the device name of the EFI partition in the terminal:
~$ diskutil list
/dev/disk0 (external):
   #:             TYPE   NAME           SIZE       IDENTIFIER
   0: GUID_partition_scheme             512.1 GB   disk0
   1:              EFI   EFI            209.7 MB   disk0s1
   2:        Apple_HFS   Main           511.8 GB   disk0s2
Then you can mount it like so:
sudo mkdir /Volumes/EFI
sudo mount -t msdos /dev/disk0s1 /Volumes/EFI
Passing through advanced CPU features
You can pass through CPU features like AVX and AES-NI for increased guest performance, see here for details.
USB passthrough
Using noVNC gets pretty annoying due to the Mac’s absence of tablet support for absolute cursor positioning. You can solve this by turning on the Mac’s screen sharing feature and using that instead. You might also be able to solve this by installing this third-party driver and re-enabling the tablet feature on the Options tab. However, since I want to use this as my primary computer, I want to use a USB keyboard and mouse plugged directly into Proxmox, rather than sending my input through the web VNC console.
Proxmox has good documentation for USB passthrough. Basically, run “qm monitor YOUR-VM-ID-HERE”, then “info usbhost” to get a list of the USB devices connected to Proxmox:
qm> info usbhost
 Bus 3, Addr 12, Port 6, Speed 480 Mb/s
 Class 00: USB device 8564:1000, Mass Storage Device
 Bus 3, Addr 11, Port 5.4, Speed 12 Mb/s
 Class 00: USB device 04d9:0141, USB Keyboard
 Bus 3, Addr 10, Port 5.1.2, Speed 12 Mb/s
 Class 00: USB device 046d:c52b, USB Receiver
 Bus 3, Addr 9, Port 14.4, Speed 12 Mb/s
 Class 00: USB device 046d:c227, G15 GamePanel LCD
 Bus 3, Addr 8, Port 14.1, Speed 1.5 Mb/s
 Class 00: USB device 046d:c226, G15 Gaming Keyboard
 Bus 3, Addr 6, Port 11, Speed 12 Mb/s
 Class e0: USB device 0b05:17d0,
 Bus 3, Addr 2, Port 1, Speed 1.5 Mb/s
 Class 00: USB device 068e:00f2, CH PRO PEDALS USB
In this case I can add my keyboard and mouse to USB passthrough by quitting qm, then running:
qm set YOUR-VM-ID-HERE -usb1 host=04d9:0141
qm set YOUR-VM-ID-HERE -usb2 host=046d:c52b
This saves the devices to the VM configuration for you. It’s possible to hot-add USB devices, but I just rebooted my VM to have the new settings apply.
You can also pass through USB devices by passing through an entire USB controller using Proxmox’s PCIe passthrough feature.
PCIe GPU passthrough
For near-native graphics performance you can pass through a video card. There are details in the Proxmox manual. You should also check out Hackintosh tutorials for more details on installing the drivers correctly (and configuring Clover correctly) for the card you want to install.
If you don’t want to pass through a video card, but want to bump the screen resolution up to 1920×1080, use Clover Configurator to set Clover’s screen resolution to match that, then enter the OVMF settings at boot time by pressing escape, and set the new resolution there as well.