
I’m migrating from FreeNAS to Proxmox 4.3. On FreeNAS, there was a built-in plugin for CrashPlan support, which I was using to back up the files that FreeNAS was serving from ZFS over the network. However, keeping this plugin running was a chore, with forced automatic CrashPlan updates frequently breaking it and requiring manual intervention to fix, and headless operation requiring an unsupported, tedious procedure to achieve, with lots of opportunities for getting it wrong.
On top of this, CrashPlan doesn’t actually support FreeBSD, and instead relies on the Linux emulation that the FreeNAS jail system provides, which puts the plugin at risk of being broken by CrashPlan relying on unsupported Linux kernel features.
By contrast, Proxmox provides the perfect environment for CrashPlan. Having a real Linux kernel available for the LVM container system to use means there’s no kernel incompatibility to worry about.
In this tutorial, I’ll show you how I installed CrashPlan into an Ubuntu 16.04 container on one of my ZFS volumes, and added bind mounts to allow CrashPlan to access my files for backup. I’ll access the CrashPlan interface from my MacBook by using X11 forwarding, so that I don’t need to do any of the “.ui_info” updating nonsense that the FreeNAS plugin required.
Download the template
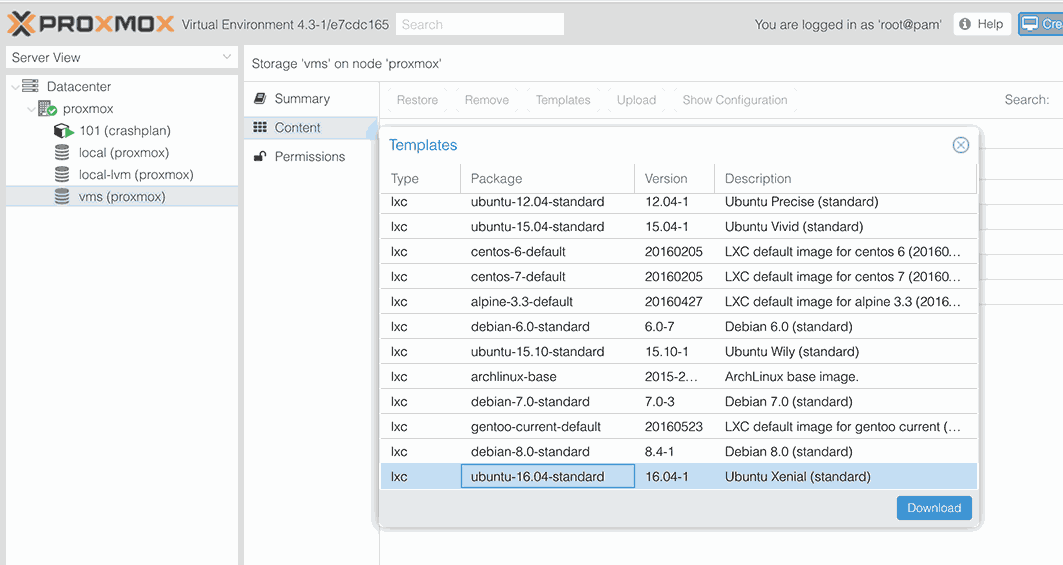
First, we’ll download the Ubuntu 16.04 template. In the Proxmox UI, click on the local storage for the node you’ll be installing the container into. On the “Content” page, hit the Templates button. Select the Ubuntu 16.04 template and hit Download.
Create the container
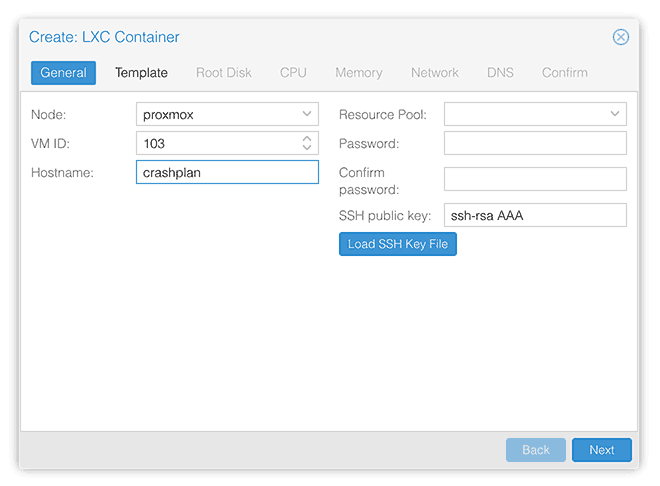
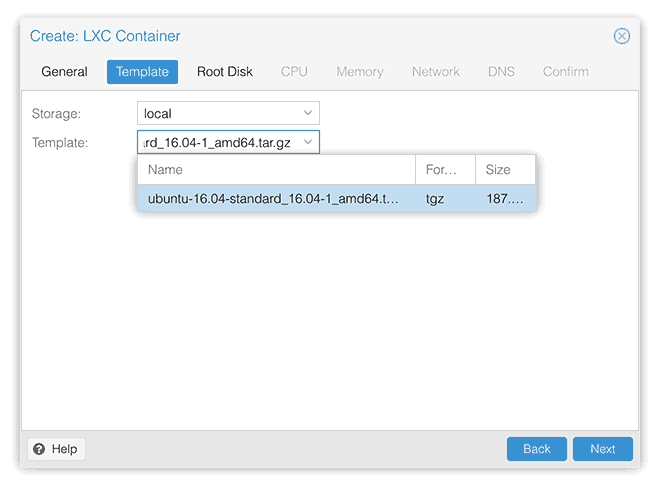
From the Proxmox UI, hit the Create CT button at the top right.
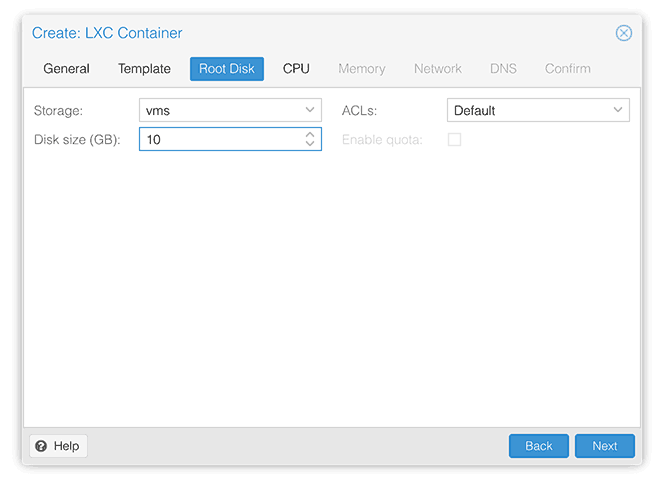
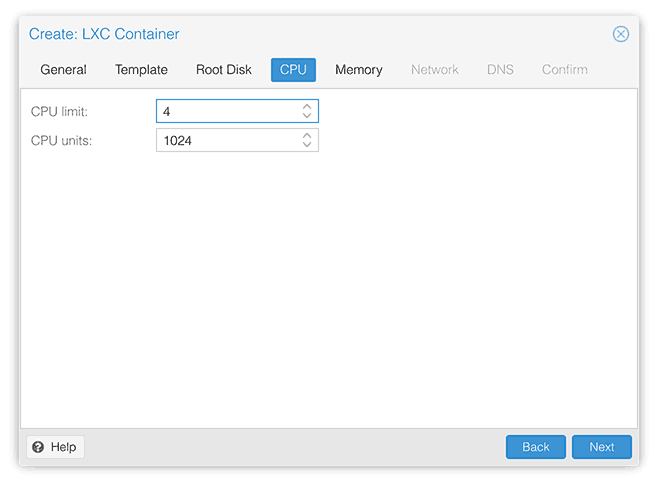
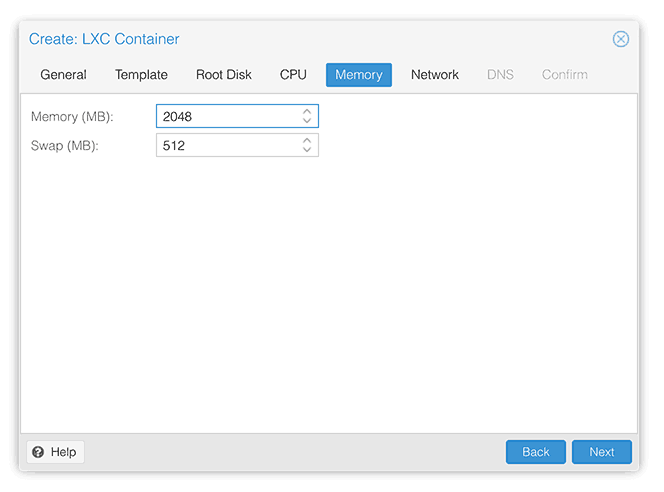
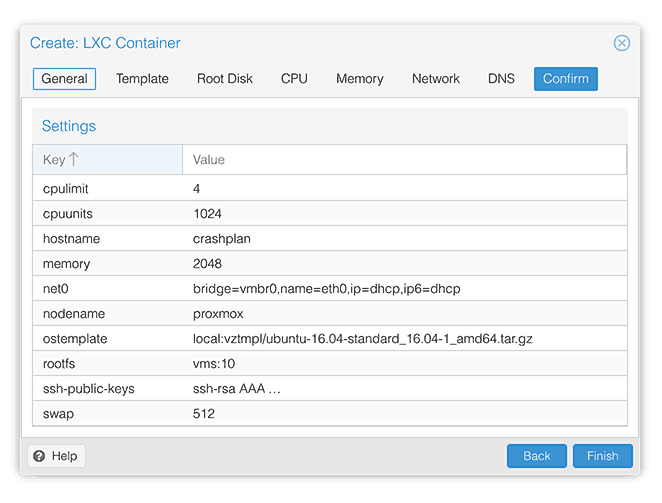
Note: If you’re using a ZFS dataset for the container’s root drive, the dataset must be mounted on Proxmox in the “standard” location (the root directory /). i.e. if your dataset is called “primary-data/lxc” then it must be mounted at “/primary-data/lxc” on Proxmox (not /mnt/primary-data/lxc as I had it set originally).
On the “options” page, I turned on “start at boot” so CrashPlan will start with Proxmox.
Attach your backup datasets
I’ll have CrashPlan back up the contents of two of my ZFS datasets into a “CrashPlan backup” dataset on a different volume. I’ll also attach a dataset to store incoming backups from other computers/VMs on my network.
We can’t use the “Add mount point” button on the “Resources” page in the GUI to attach datasets, since it doesn’t let us create bind mounts to allow CrashPlan to access existing ZFS datasets. Instead we’ll SSH into Proxmox and edit “/etc/pve/lxc/YOUR-VM-ID-HERE.conf” using nano or vim.
I add a series of mount points to the bottom of the file:
# Take the ZFS dataset mounted at /primary-data/data
# on Proxmox, and mount it to /mnt/data inside the
# CrashPlan container.
#
# I chose this mount point to be in the same location as
# it used to be was when I was using FreeNAS for easy
# adoption of the old CrashPlan backup archive:
mp0: /primary-data/data,mp=/mnt/data
mp1: /primary-data/photos,mp=/mnt/photos

# Now my two mount points for Crashplan's backup archives and
# inbound backups from other machines
mp2: /crashplan/backup,mp=/mnt/backup
mp3: /crashplan/inbound,mp=/mnt/inbound
Start up your container, SSH into it using the container’s IP and the root account, and verify that your mount points attached successfully (any typos will result in the mounts going missing).
I found I had to restart the container once before it would let me connect using SSH. You could also SSH into Proxmox, run pct enter YOUR-VM-ID-HERE to get a shell into the container, then run service restart ssh to kick it back into life for you.
Install CrashPlan
Go to the CrashPlan website and grab the latest download link for the Linux version.
On your container, bring the system up to date, install the GTK2 prerequisite, then install CrashPlan using the link you grabbed:
apt-get update
apt-get dist-upgrade -y
apt-get install libgtk2.0-bin -y
# While we're here, remove mlocate, because if we have a lot of files it really sucks up resources
apt-get remove mlocate -y

# For CrashPlan Pro, we also need these packages:
apt-get install libxss1 libnss3-dev libasound2 -y
wget https://download.code42.com/installs/linux/install/CrashPlan/CrashPlan_4.8.0_Linux.tgz
tar -xf CrashPlan_4.8.0_Linux.tgz
cd crashplan-install
./install.sh
The only question I need to answer is the location for incoming backups (received from other computers) since I mounted that device at /mnt/inbound, the rest can be left at their defaults:
Welcome to the Code42 CrashPlan installer.

Press enter to continue with installation.

Validating environment...
 detected root permissions

What parent directory do you wish to install CrashPlan into? [/usr/local]

What directory do you wish to link the CrashPlan executable to? [/usr/local/bin]

What directory do you wish to store incoming backup data? [/usr/local/var/crashplan] /mnt/inbound

What directory contains your SYSV init scripts? [/etc/init.d]

What directory contains your runlevel init links? [/etc/rc5.d]

Your selections:
CrashPlan will install to: /usr/local/crashplan
And put links to binaries in: /usr/local/bin
And store data in: /mnt/inbound
Your init.d dir is: /etc/init.d
Your current runlevel directory is: /etc/rc5.d

Is this correct? (y/n) [y]
CrashPlan will download and install a JVM for us, then installation will be complete:
CrashPlan has been installed and the Service has been started automatically.

Important directories:
 Installation:
 /usr/local/crashplan
 Logs:
 /usr/local/crashplan/log
 Default archive location:
 /mnt/inbound
 Readme:
 /usr/local/crashplan/doc

Start Scripts:
 sudo /usr/local/crashplan/bin/CrashPlanEngine start|stop
 /usr/local/crashplan/bin/CrashPlanDesktop

To start the Desktop UI:
 /usr/local/bin/CrashPlanDesktop
Run the CrashPlan GUI
Now we just need to launch the desktop UI. We’ll run the CrashPlan desktop app inside the container, and have it connect to an X server running on our local machine to display its UI.
This requires SSH with X11 forwarding support and an X server on the machine that’ll display the UI.
- On macOS, install XQuartz to provide a local X server, and we’ll use macOS’s built-in SSH
- On Linux, you should already have an X server and SSH installed
- On Windows, you can use Xming and puTTY
Now on Linux and macOS, to start up the CrashPlan UI we enable X-forwarding with “-Y” when we SSH to CrashPlan:
ssh -Y root@YOUR-CRASHPLAN-IP
Then run the GUI:
# CrashPlanDesktop
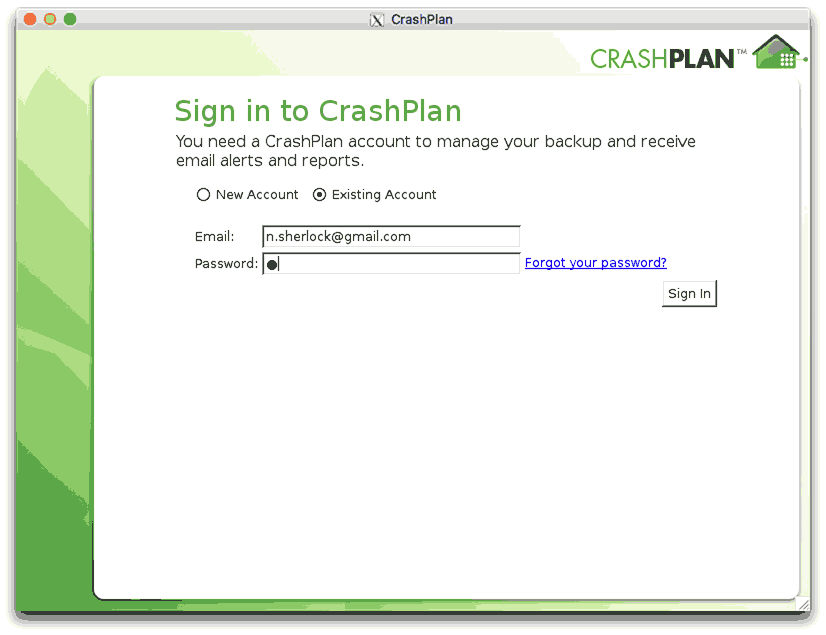
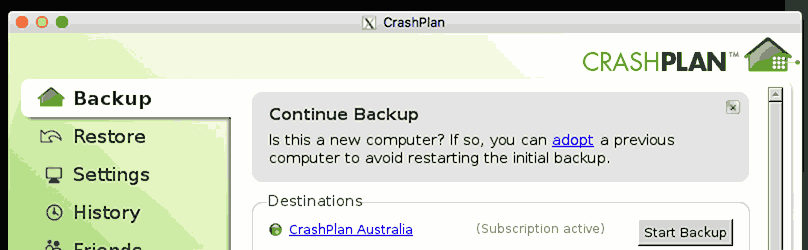
I logged in to my existing account and adopted the backup that CrashPlan on my FreeNAS used to manage. On the Backup tab, I checked that CrashPlan was finding the files to be backed up correctly from ZFS. At the bottom of the Backup tab, I checked that the Inbound backups were using the correct paths (if the Inbound path has changed, the Inbound backups need to be individually adjusted to match). Finally, on the Destinations tab, I made sure that my main “Folder” destination was set to “/mnt/backup” (this is where I have CrashPlan put its main backup archive).
That’s it! Once we’re satisfied that we’ve got it running, we can exit the GUI. The CrashPlan backup service will continue backing up in the background for us.
I’m hopeful that Crashplan will be able to keep itself up to date automatically without any hiccups. But if it doesn’t, it’ll be a simple matter to re-run the installer and adopt the old backup.
Nick – As always, thank you for posting your work, here. Your work has inspired me to rethink how my rig should be configured.
I have been unsuccessful at setting up an LXC to access the internet or to be able to ssh into it. I scoured the internet to see if there were any solutions and there didn’t seem to be any. Did you do anything additional to have your container access the internet or to be able to ssh into it outside of setting it to DHCP? Many thanks in advance!
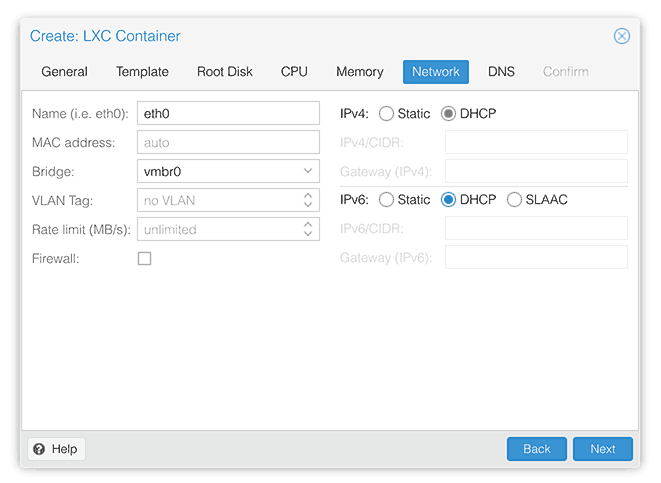
Nope, I just created a new container now using the settings in the screenshots, and I was able to use the internet from it immediately with no further configuration.
Which interface is it bridging to, vmbr0? I don’t recall changing any settings on my network bridge.
Did you maybe tick “unprivileged container”? I’m not sure if that impacts connectivity or not, but I left it unticked.
Nick you are a champion. This was exactly what I’ve been trying to do. With my limited linux knowledge I almost lost my s!4t trying to get nfs to play nice mounting directly from within an ubuntu guest to a share on my Synology NAS. This finally solved it for me.
I was also previously taking the very circuitous path of running CrashPlan headless in the ubuntu guest and accessing with the client installed on my Mac – with all the fiddling and upgrade headaches involved in separating the client and backup engine. Accessing the GUI using X server on my mac is genius.
Thank you so much for this!
Nick, thank you so much for this. It really helped me to get crashplan running again painlessly after I made the transition from macOS to proxmox on my mac pro tower. Thank you so much!
Hey Nick and others, just wondering if this is still working for you? For some reason the GUI doesn’t launch anymore. I tested with xcalc and xeyes, and those apps are still forwarded to my local MacBook. But the crashplan GUI doesn’t launch. I’ve re-install XQuartz, fiddled with all sorts of ssh (macbook) and sshd (ubuntu CT) settings to no avail. Thanks!
It’s still working for me. My CrashPlan is version 4.8.4.
Make sure you still have libgtk2.0-bin installed, which is a prerequisite for the CrashPlan GUI to work, but isn’t required for xcalc and xeyes.
OK I finally figured it out. The instructions here work fine for the regular Crashplan client, but not the CrashplanPro client (I recently switched over). The X forwarding to my mac would work upon initial install of the client, but then after it did what I assume to be some internal update, it needed some other dependencies. I found a doc called “CrashPlan app closes in some Linux installations” and tailed the logs it mentioned there, specifically these: /usr/local/crashplan/log/ui*. Resolved the dependencies it complained about, summarized by: apt install libxss1 libnss3-dev libasound2. Now it works, even with the latest version 6.7.0 client. Thank you so much, Nick!
Thanks for the info! I’ve now updated the post to include those details.
Now you need gconf as well.
Hi Nick,
Just been working through this rather nicely done little how-to for Crash Plan set-up , then checked on the Crash plan web site (which my now redundent ubuntu server is on) and realised that Crash plan Home is not running anymore, every one is either been given choice of moving to Carbonite or change to Crash plan business (with monthly fee 🙁 , surprise ). Full closure of service will be in October this year. Just thought I would leave reply in case you had missed this bulletin, as I had. Looks like I will have to look at trying to integrate Carbonite into proxmox for backups instead.
Yep, bit of a bummer. I’m running my Crashplan right up until the shutoff, alongside Duplicacy which is my new backup solution.
Hi Nick and others, just wondering if your Crashplan setup is still working for you? My setup broke a week or so ago, and I haven’t been able to fix it or start up a new instance. I contacted Crashplan support with my logs and they told me 1) make sure to have these packages installed “libgconf-2-4 libnss3 libxss1 libXScrnSaver net-tools”, 2) they don’t support Proxmox containers (they inferred from the kernel version), 3) and they don’t support headless installs.
I was able to get the latest Crashplan Pro client running in a bunsen labs (debian based) VM. But not in a container nor in a headless VM. I guess I could set it up in a full VM like bunsen labs, but the beauty of this setup was being able to use a lightweight container!
Just wanted to check in and see if anyone else was having problems. 🙂
Just to update this thread, ran into the same issues on prox mox with a debian lxc. had to install xfce4 (my choice of window manager, your mileage may vary with more lightweight window managers) and the ssh -X worked as expected. I didnt have to start the desktop, so there is a dependency that is not being installed. The CrashPlanDesktop is not that great at reporting errors, and the dmesg/syslogs were clean. Im sure i can work backwards and remove some things, but installing a window manager and not using it worked for me.