
Have you run out of room on your macOS VM’s disk? Here’s how you can expand it.
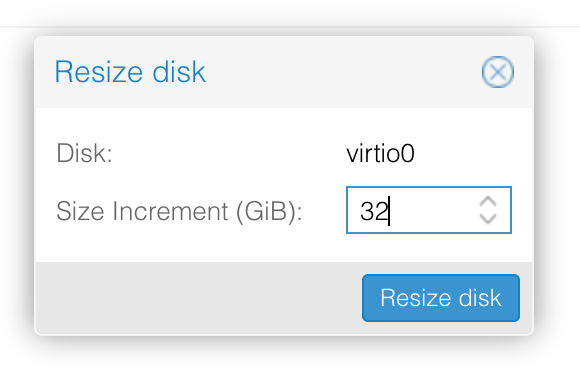
In the Hardware tab for your VM, select your disk and click the “resize disk” button at the top of the page. Enter the size increment in gigabytes (note, this is not the final size you want to achieve, it is the amount the disk will grow by).
macOS won’t take advantage of this new space yet, we’ll need to expand the APFS volume to fill the disk. Boot up macOS, open up Terminal, and run “diskutil list” to check what the disk is called:
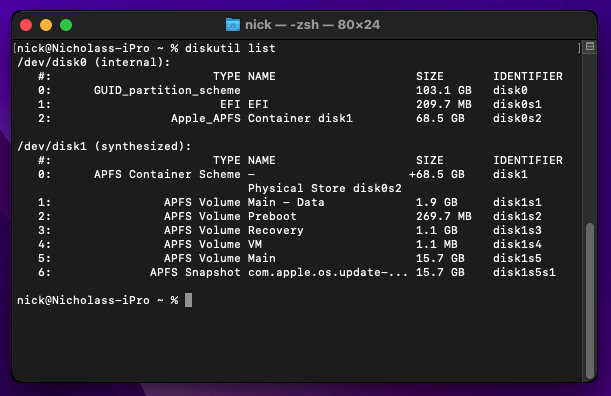
Here you can see that despite disk0 being 103.1GB big, the disk1 APFS container that is hosted on it is only 68.5GB.
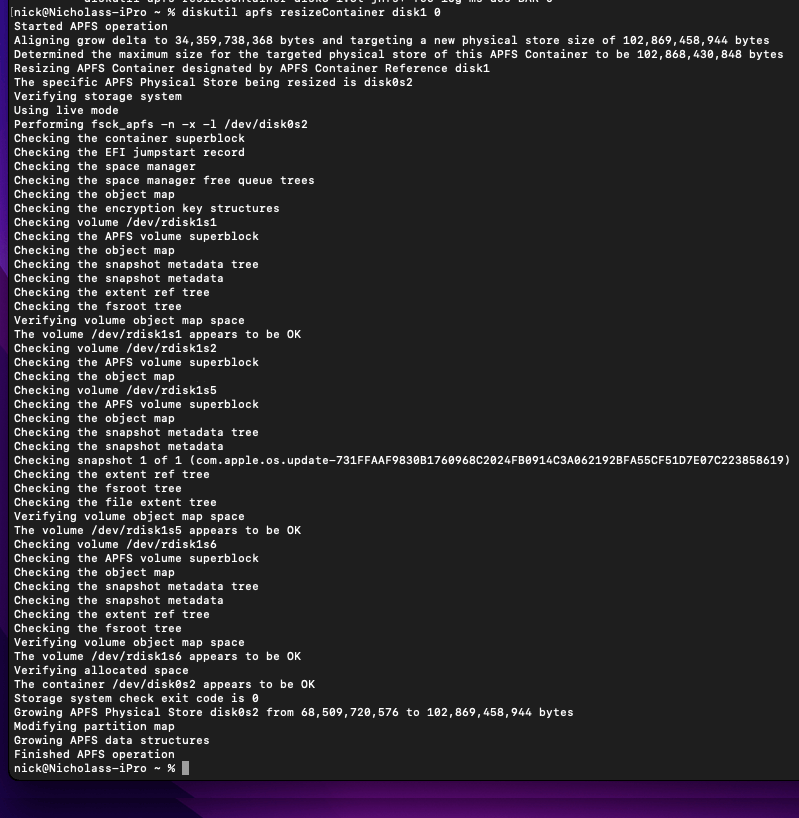
First run “diskutil repairDisk disk0” to grow the partition table to fill the entire disk:

Now we can resize the APFS container, run “diskutil apfs resizeContainer disk1 0” to grow it to fill the entire disk:
Now that new space should be available to your macOS VM!
THANK YOU SO MUCH!
Thank you so very much!
I searched the net and didn’t find a good answer* to this – and here it is!
*Answers found in proxmox forum(btw even by proxmox staff) – where’d helpful or just plainly wrong! Like use the GUI…which of course didn’t work.
The real problem is the disk seems to continue growing as if the TRIM feature is not working
You need to have the discard checked, then emulate ssd.
In macOS you may need to run ‘sudo trimforce enable’ to enable trim. Check under system info that macOS has trim enabled.
Still the bomb! Thank’s Nick!