
I thought it might be helpful for people following my guide for installing macOS 12 Monterey on Proxmox if I described my setup and how I’m using macOS.
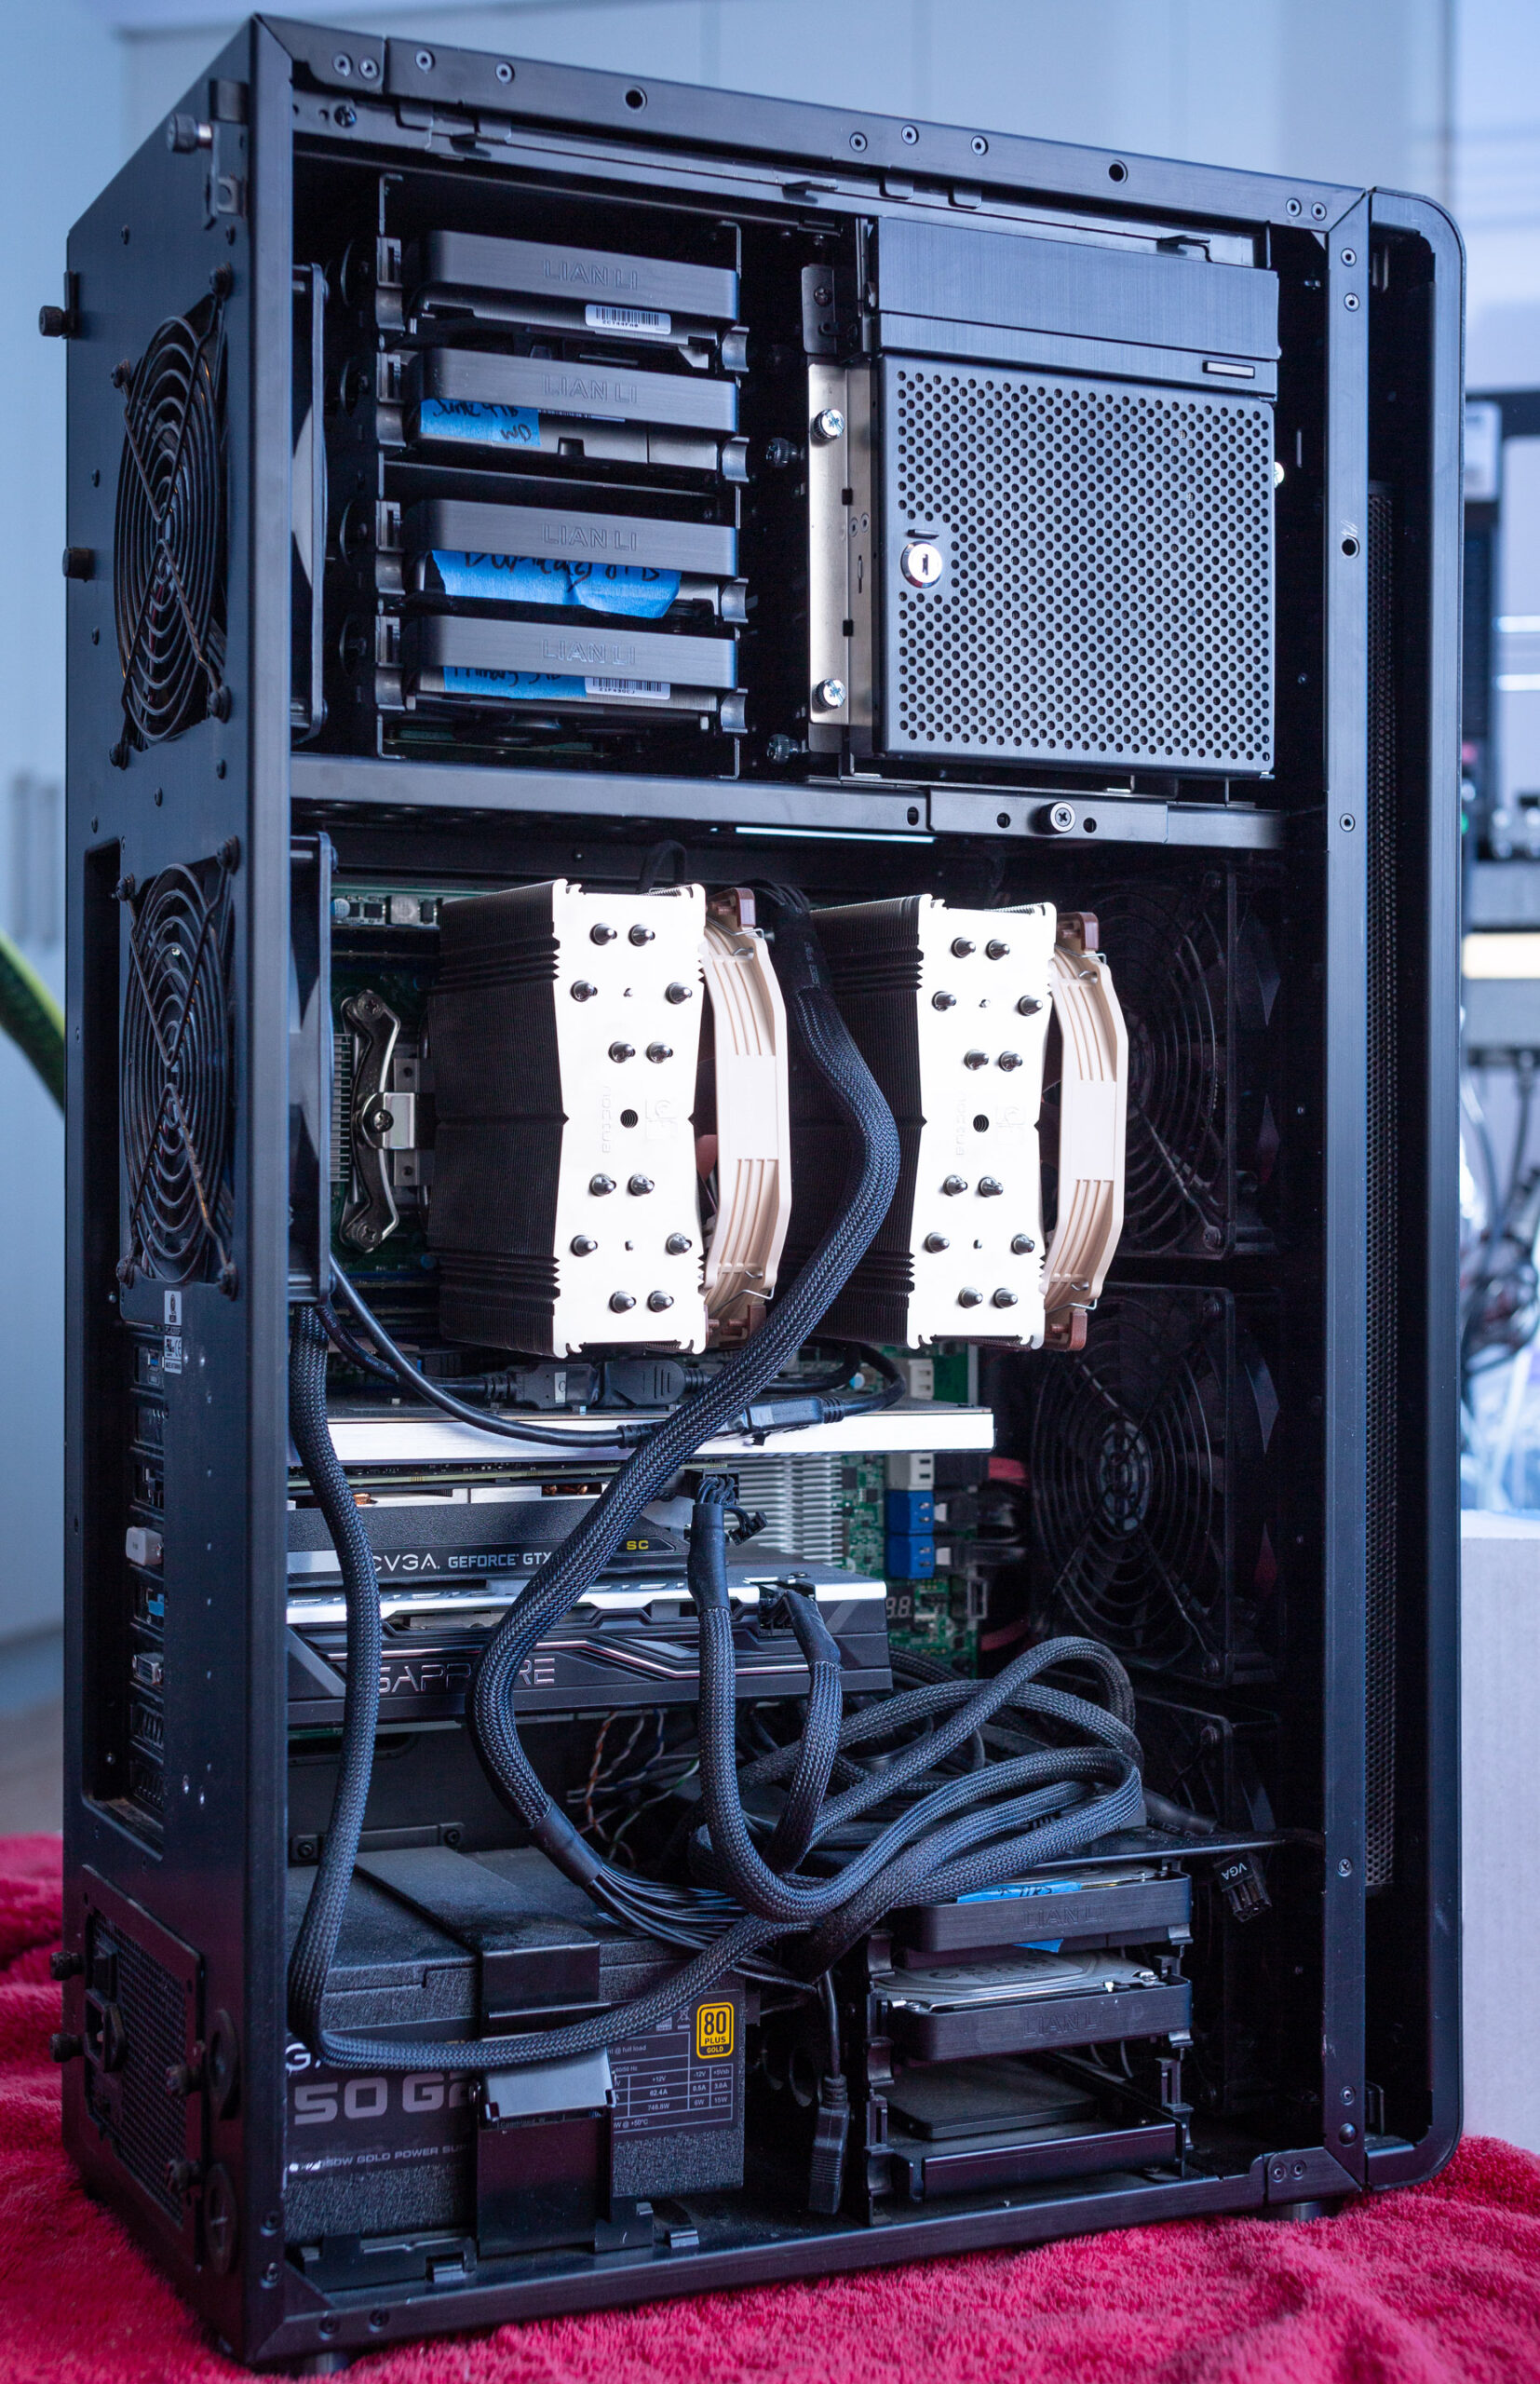
Proxmox hardware specs
- Motherboard: Asrock EP2C602
- RAM: 64GB
- CPU: 2 x Intel E5-2687W v2 for a total of 16 cores / 32 threads
- Storage
- ASUS Hyper M.2 X16 PCIe 4.0 X4 Expansion Card
- Samsung 970 Evo 1TB NVMe SSD for macOS
- Samsung 950 Pro 512GB NVMe SSD
- 38TB of spinning disks in various ZFS configurations
- 1TB SATA SSD for Proxmox’s root device
- ASUS Hyper M.2 X16 PCIe 4.0 X4 Expansion Card
- Graphics
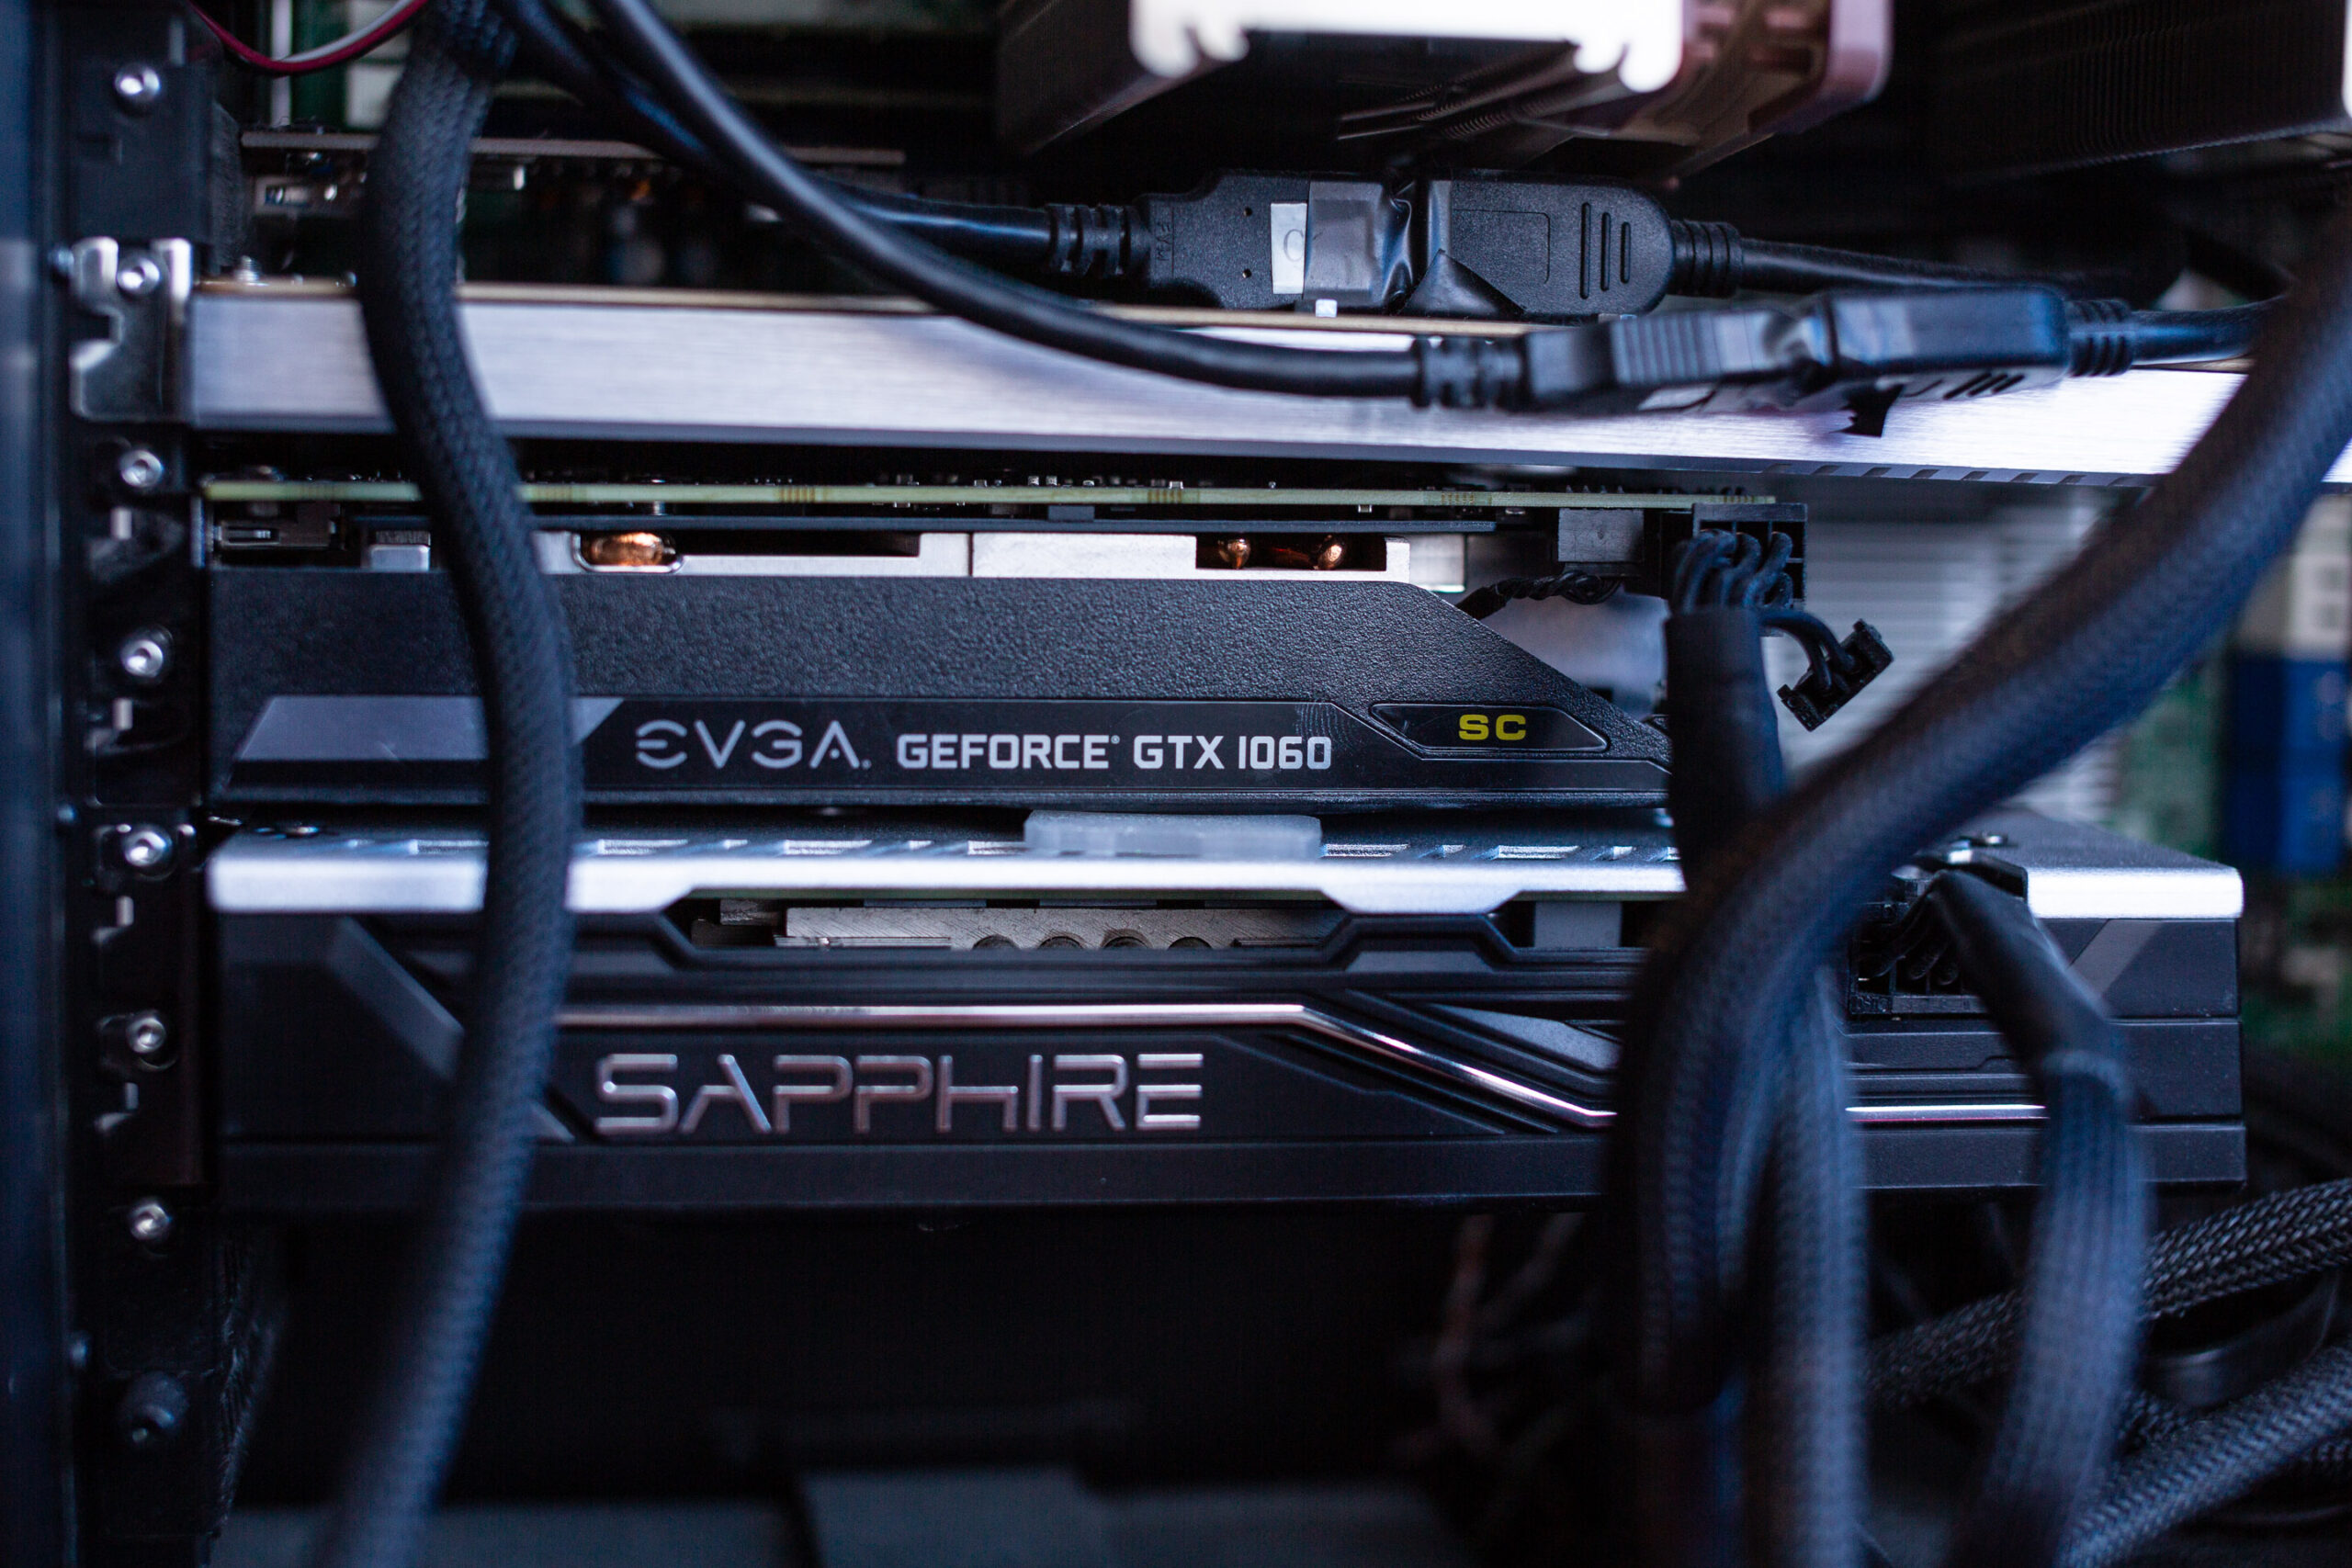
- EVGA GeForce GTX 1060 6GB
- AMD Radeon R9 280X (HD 7970 / Tahiti XTL) (not currently installed)
- AMD Sapphire Radeon RX 580 Pulse 8GB (11265-05-20G)
- IO
- 2x onboard Intel C600 USB 2 controllers
- Inateck USB 3 PCIe card (Fresco Logic FL1100 chipset)
- 2x onboard Intel 82574L gigabit network ports
- Case
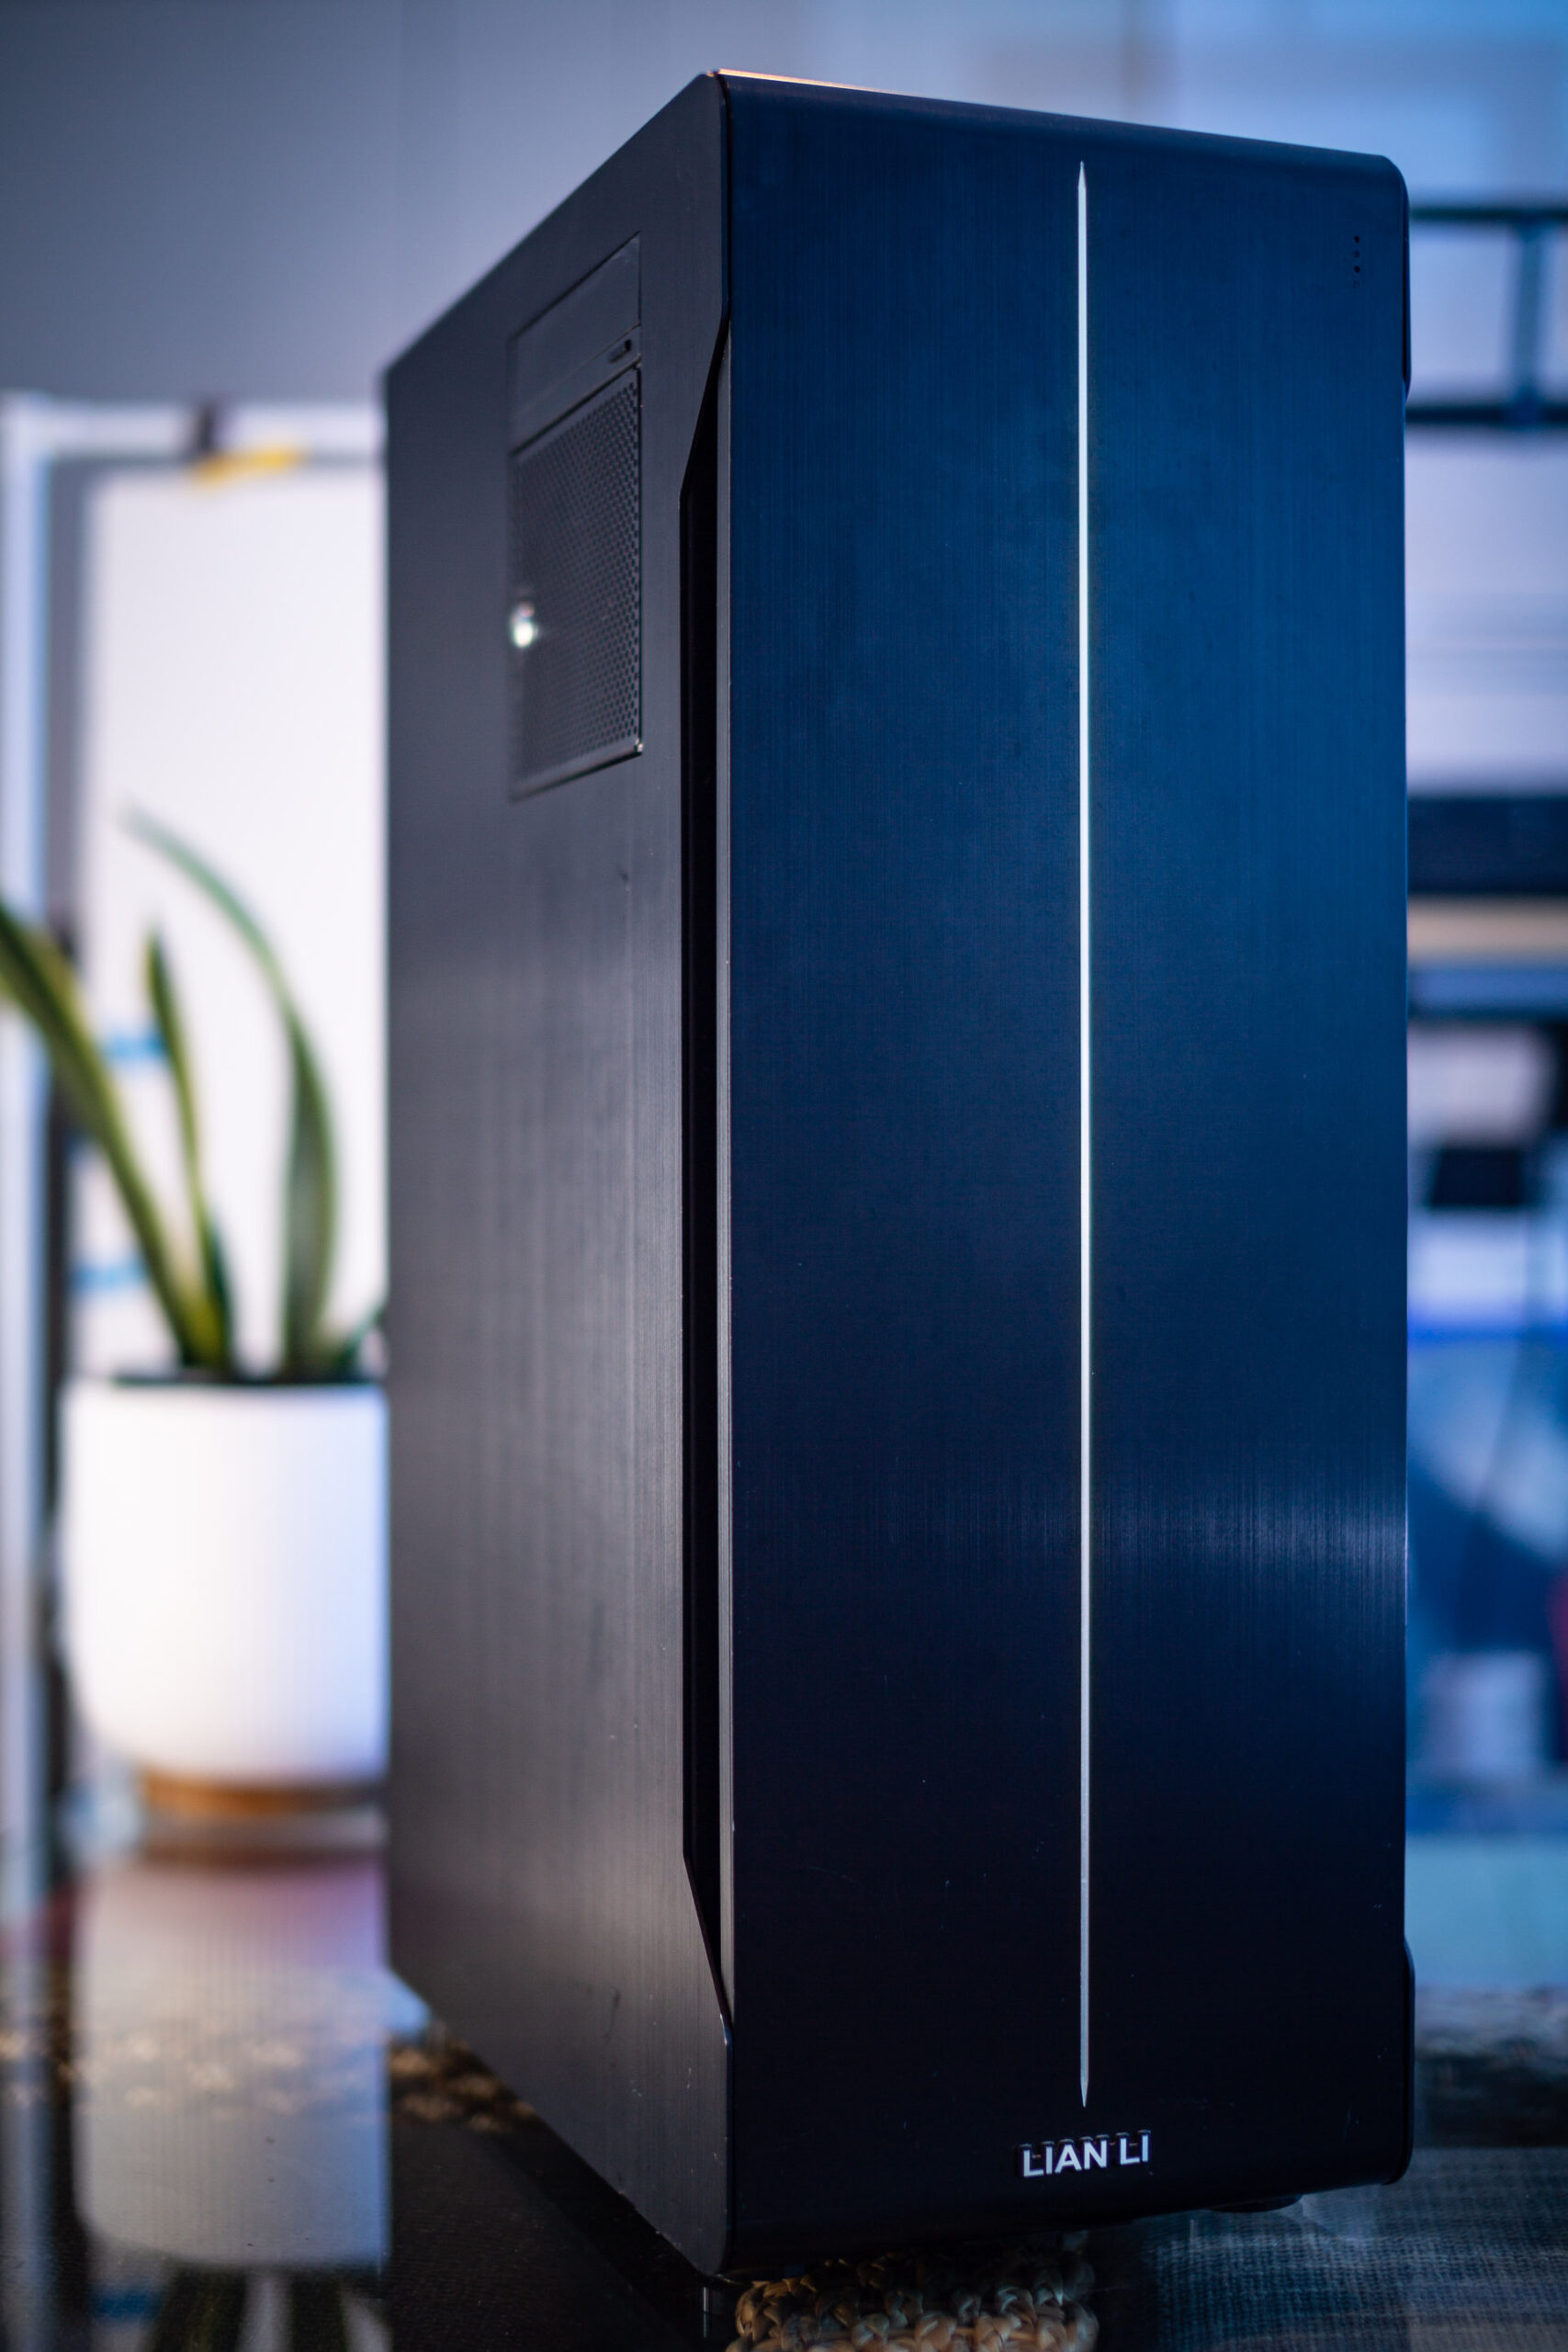
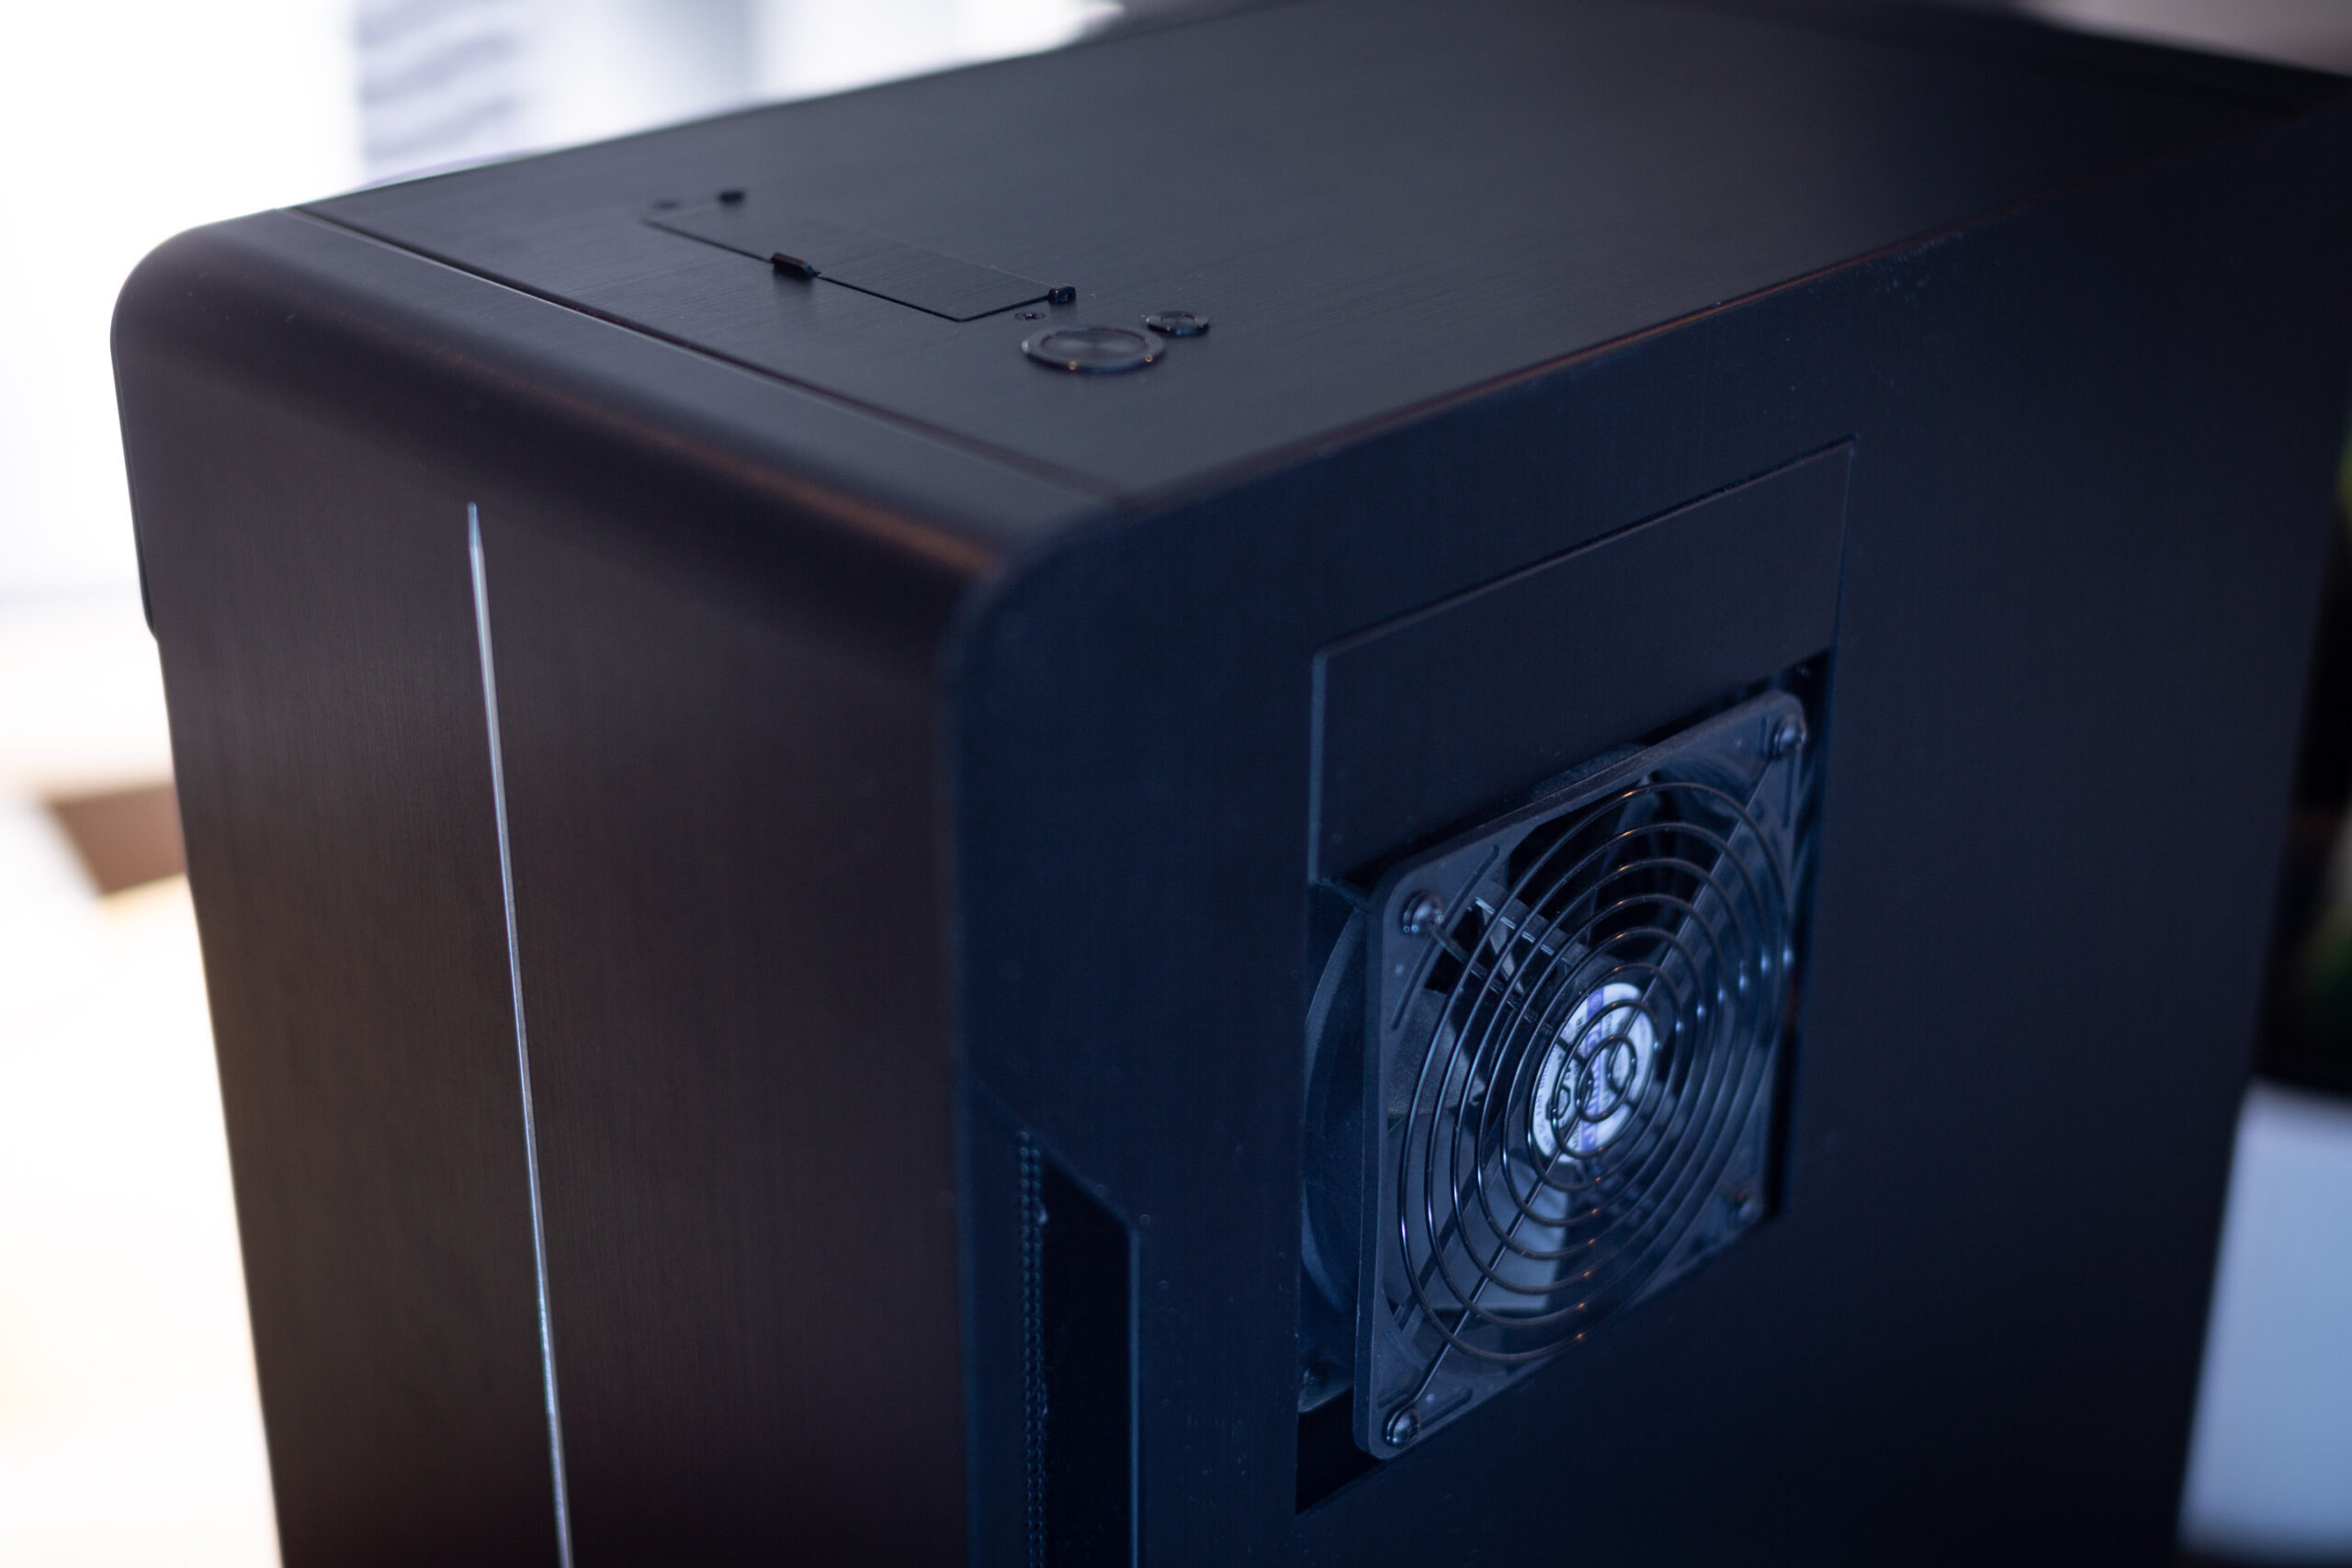
- Lian Li PC-X2000F full tower (sadly, long discontinued!)
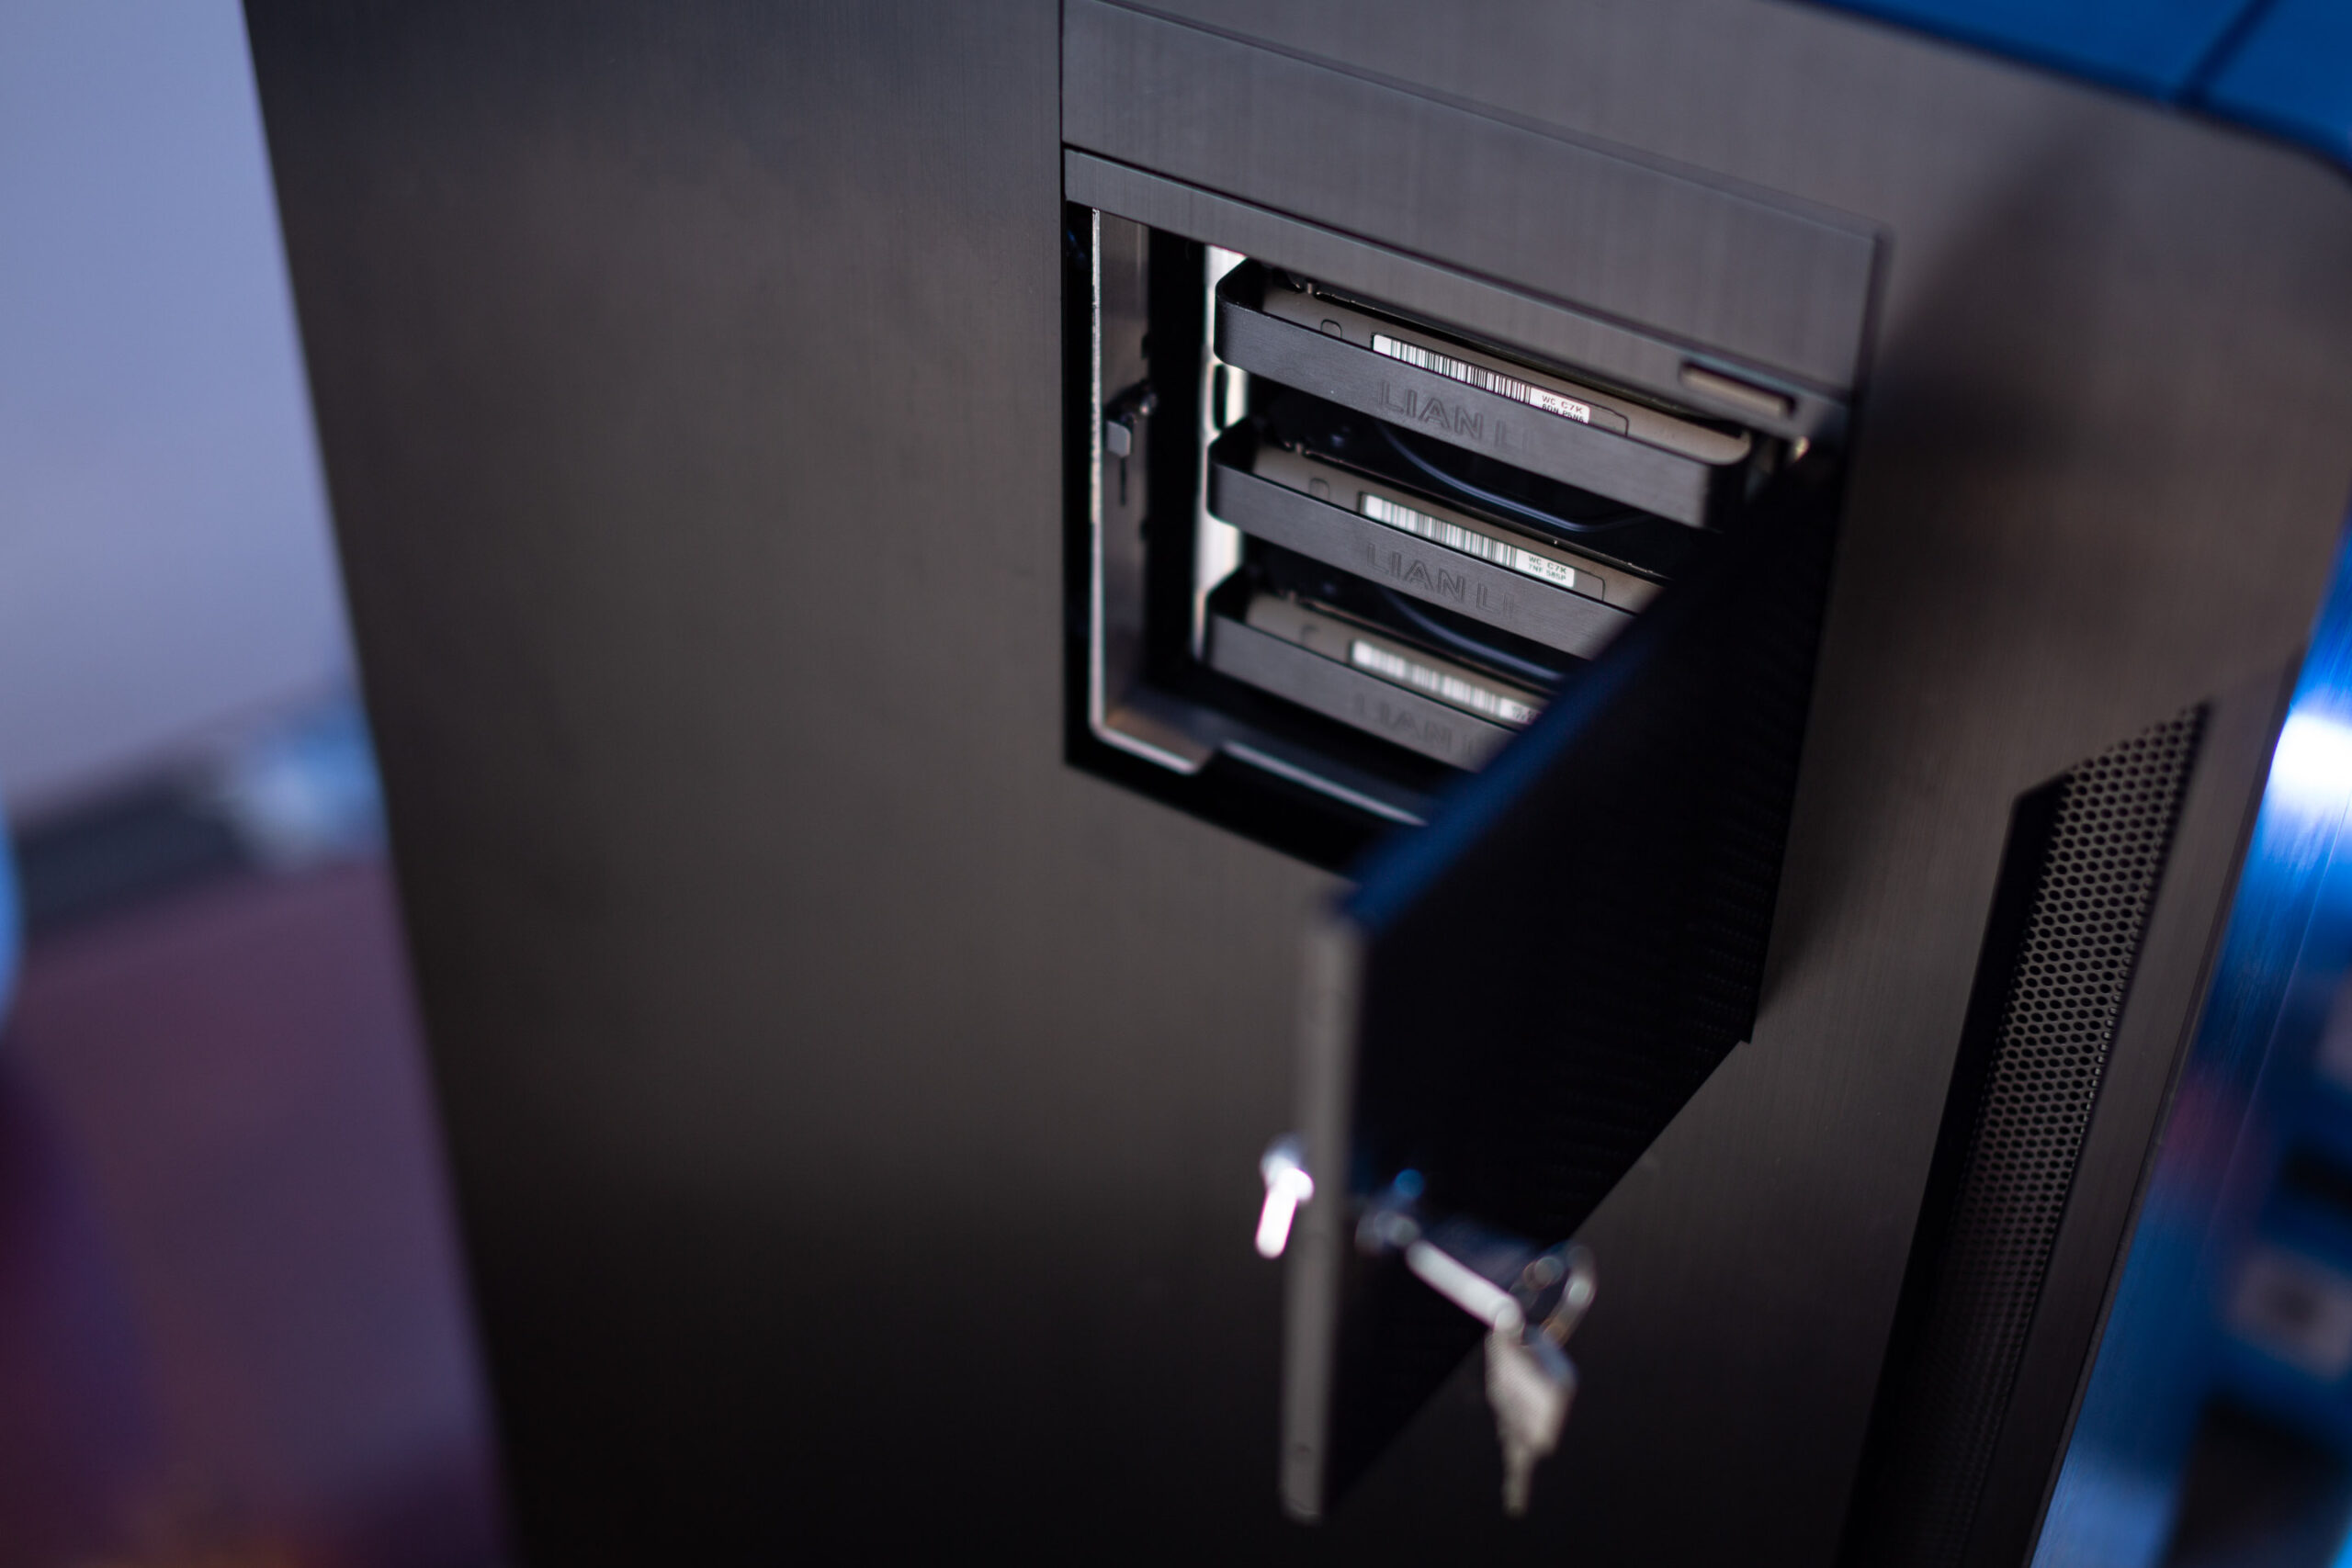
- Lian Li EX-H35 HDD Hot Swap Module (to add 3 x 3.5″ drive bays into 3 of the 4 x 5.25″ drive mounts), with Lian Li BZ-503B filter door, and Lian Li BP3SATA hot swap backplane. Note that because of the sideways-mounted 5.25″ design on this case, the door will fit flush with the left side of the case, while the unfiltered exhaust fan sits some 5-10mm proud of the right side of the case.
- CPU cooler
- 2 x Noctua NH-U14S coolers
- Power
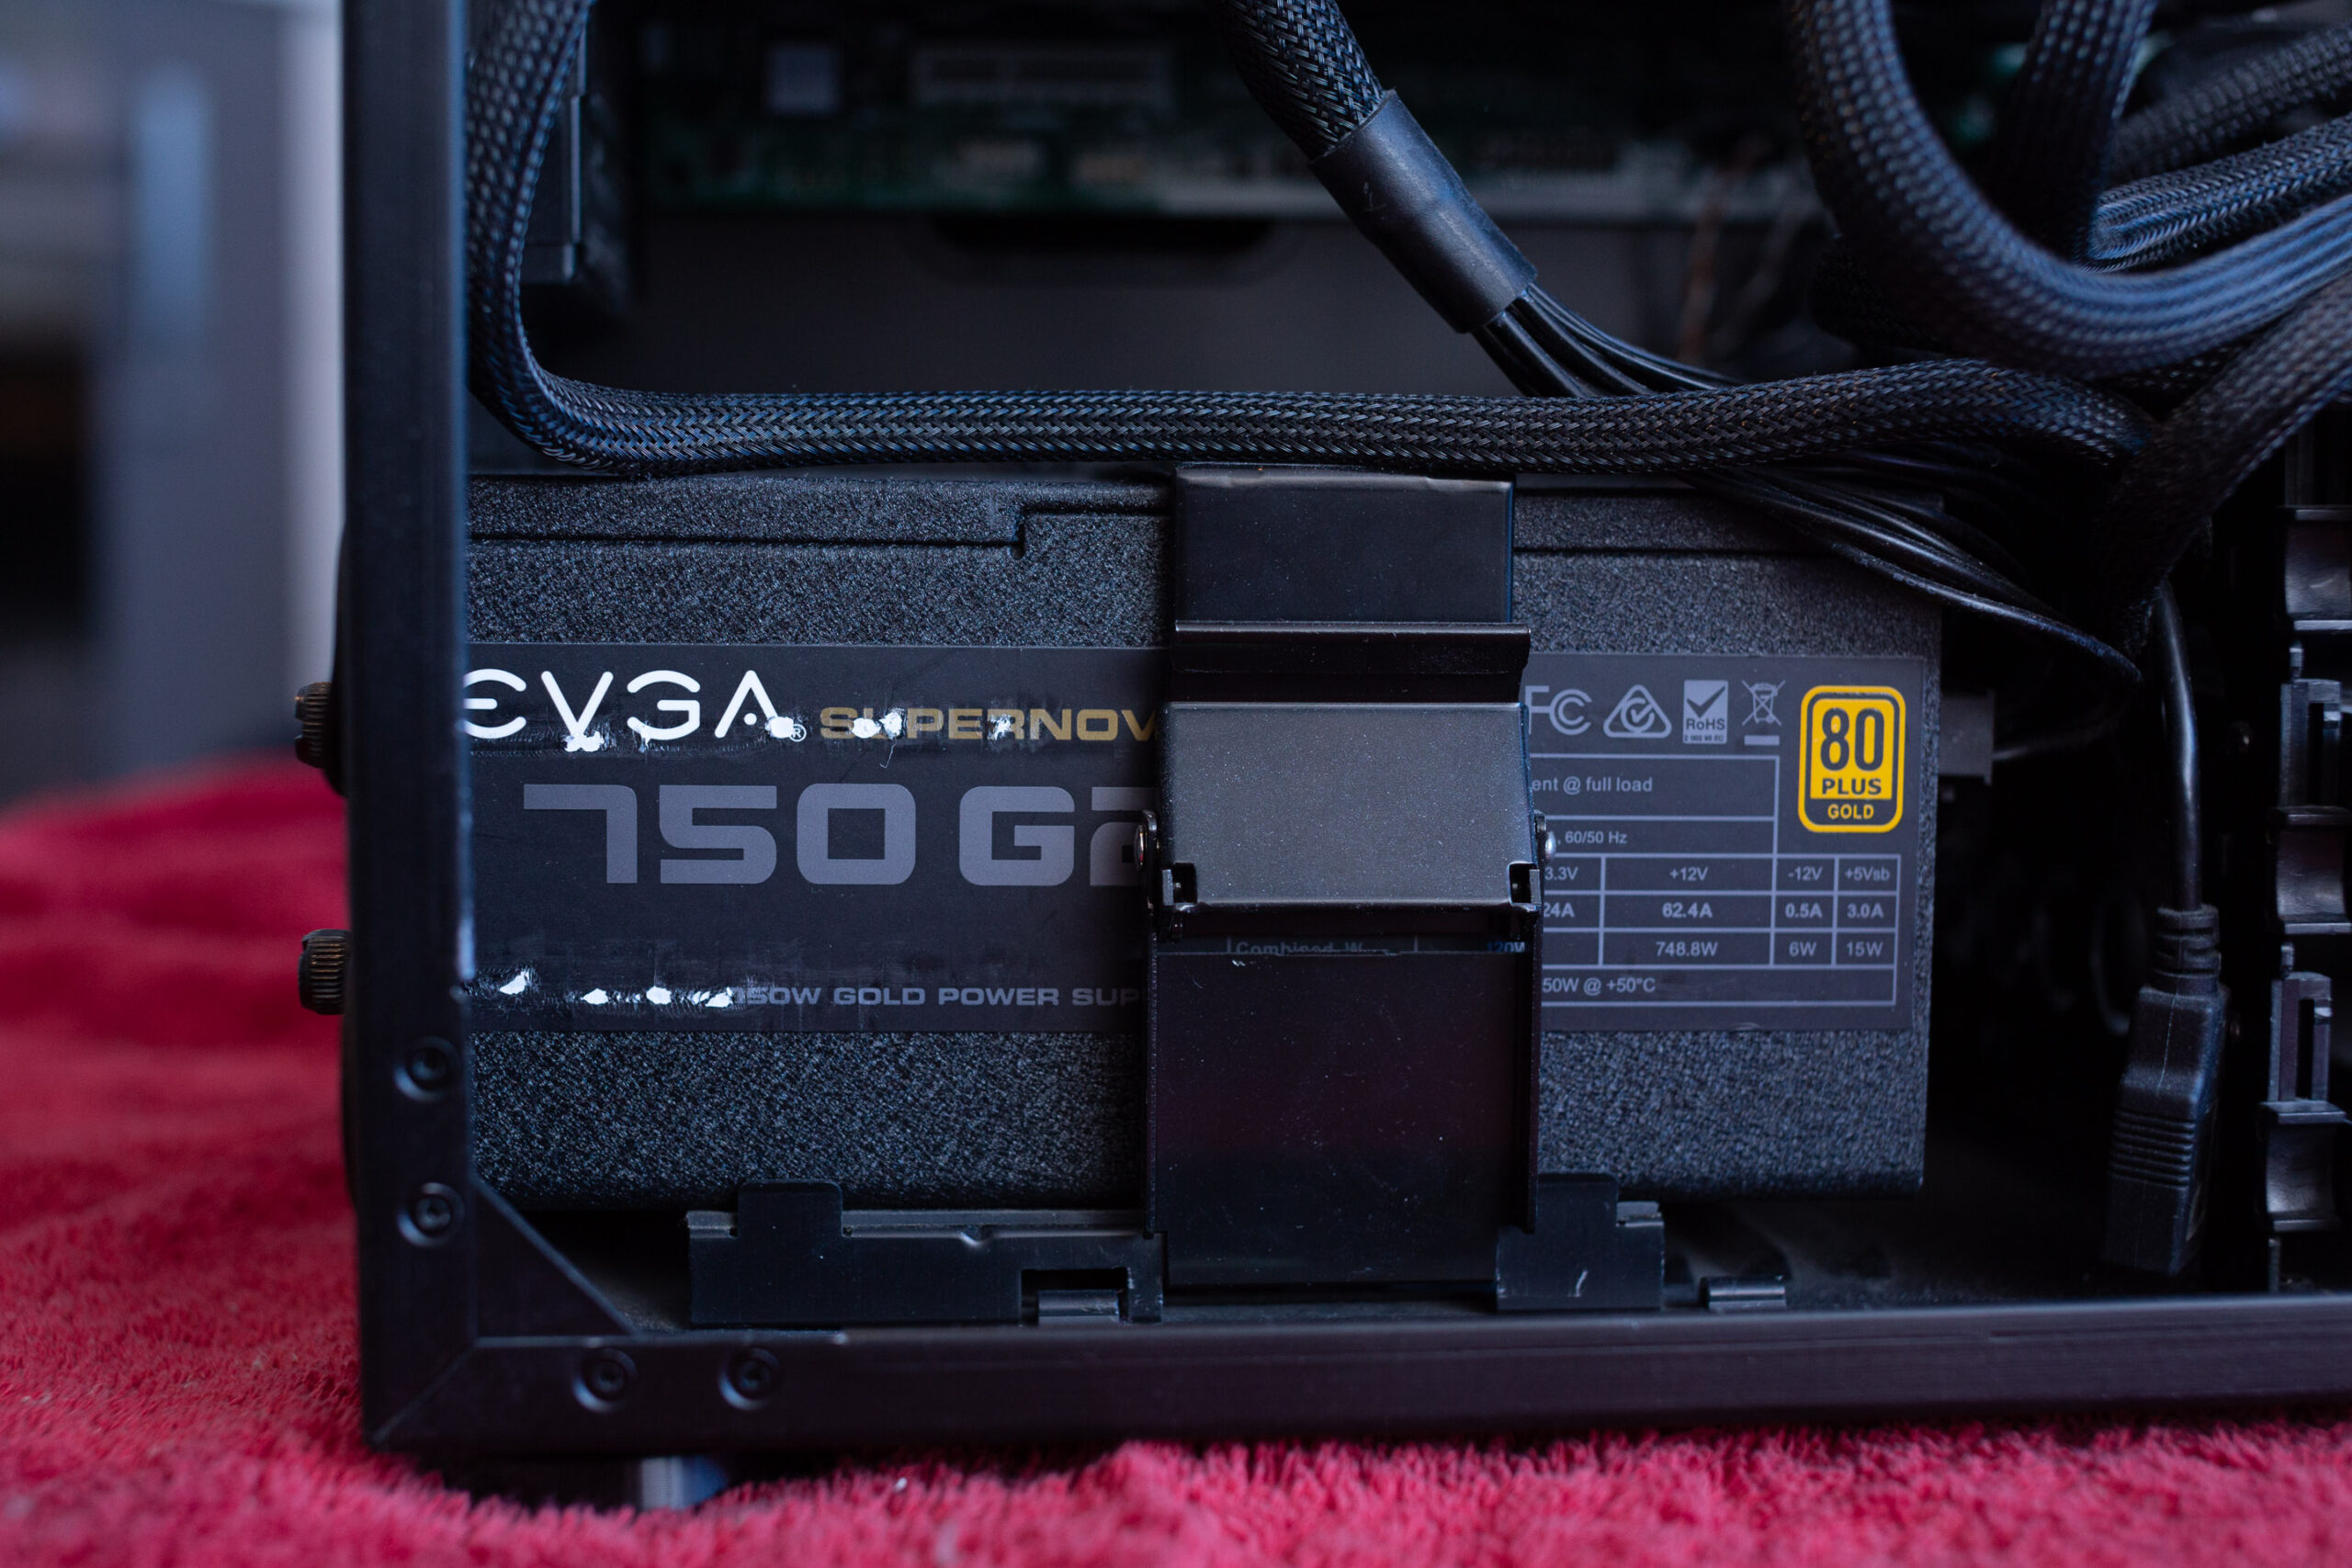
- EVGA SuperNOVA 750 G2 750W
My Proxmox machine is my desktop computer, so I pass most of this hardware straight through to the macOS Monterey VM that I use as my daily-driver machine. I pass through both USB 2 controllers, the USB 3 controller, an NVMe SSD, and one of the gigabit network ports, plus the RX 580 graphics card.
Attached to the USB controllers I pass through to macOS are a Bluetooth adapter, keyboard, Logitech trackball dongle, and sometimes a DragonFly Black USB DAC for audio (my host motherboard has no audio onboard).
Once macOS boots, this leaves no USB ports dedicated to the host, so no keyboard for the host! I normally manage my Proxmox host from a guest, or if all of my guests are down I use SSH from a laptop or smartphone instead (JuiceSSH on Android works nicely for running qm start 100 to boot up my macOS VM if I accidentally shut it down).
On High Sierra, I used to use the GTX 750 Ti, then later the GTX 1060, to drive two displays (one of them 4k@60Hz over DisplayPort) which both worked flawlessly. However NVIDIA drivers are not available for Monterey, so now I’m back with AMD.
My old AMD R9 280X had some support in Catalina, but I got flashing video corruption on parts of the screen intermittently, and it wasn’t stable on the host either, triggering DMAR warnings that suggest that it tries to read memory it doesn’t own. This all came to a head after upgrading 10.15.4, it just went to a black screen 75% of the way through boot and the system log shows the GPU driver crashed and didn’t return.
Now I’m using the Sapphire Radeon Pulse RX 580 8GB as suggested by Passthrough Post. This one is well supported by macOS, Apple even recommends it on their website. Newer GPUs than this, and siblings of this GPU, suffer from the AMD reset bug that makes them a pain in the ass to pass through. You can now use the vendor-reset module to fix some of these.
Despite good experiences reported by other users, I’m still getting reset-bug-like behaviour on some guest boots, which causes a hang at the 75% mark on the progress bar just as the graphics would be initialised (screen does not go to black). At the same time this is printed to dmesg:
pcieport 0000:00:02.0: AER: Uncorrected (Non-Fatal) error received: 0000:00:02.0
pcieport 0000:00:02.0: AER: PCIe Bus Error: severity=Uncorrected (Non-Fatal), type=Transaction Layer, (Requester ID)
pcieport 0000:00:02.0: AER: device [8086:3c04] error status/mask=00004000/00000000
pcieport 0000:00:02.0: AER: [14] CmpltTO (First)
pcieport 0000:00:02.0: AER: Device recovery successful
This eventually hangs the host. It looks like the host needs to be power-cycled between guest boots for the RX 580 to be fully reset.
On this motherboard is a third SATA controller, a Marvell SE9230, but enabling this in the ASRock UEFI setup causes it to throw a ton of DMAR errors and kill the host, so avoid using it.
My ASUS Hyper M.2 X16 PCIe 4.0 X4 Expansion Card allows motherboards that support PCIe-slot bifurcation to add up to 4 NVMe SSDs to a single x16 slot, which is wonderful for expanding storage. Note that bifurcation support is an absolute requirement with this card, if your system doesn’t support it you need to use one that has a PCIe switch chip onboard instead.
What I use it for
I’m using my Monterey VM for developing software (IntelliJ / XCode), watching videos (YouTube / mpv), playing music, editing photos with Photoshop and Lightroom, editing video with DaVinci Resolve, buying apps on the App Store, syncing data with iCloud, and more. That all works trouble-free. I don’t use any of the Apple apps that are known to be troublesome on Hackintosh (iMessage etc), so I’m not sure if those are working or not.
VM configuration
Here’s my VM’s Proxmox configuration, with discussion to follow:
agent: 1
args: -device isa-applesmc,osk="..." -smbios type=2 cpu host,kvm=on,vendor=GenuineIntel,+kvm_pv_unhalt,+kvm_pv_eoi,+hypervisor,+invtsc,+pdpe1gb,check -smp 32,sockets=2,cores=8,threads=2 -device 'pcie-root-port,id=ich9-pcie-port-6,addr=10.1,x-speed=16,x-width=32,multifunction=on,bus=pcie.0,port=6,chassis=6' -device 'vfio-pci,host=0000:0a:00.0,id=hostpci5,bus=ich9-pcie-port-6,addr=0x0,x-pci-device-id=0x10f6,x-pci-sub-vendor-id=0x0000,x-pci-sub-device-id=0x0000' -global ICH9-LPC.acpi-pci-hotplug-with-bridge-support=off
balloon: 0
bios: ovmf
boot: order=hostpci4
cores: 16
cpu: Penryn
efidisk0: vms:vm-100-disk-1,size=128K
hostpci0: 03:00,pcie=1,x-vga=on
hostpci1: 00:1a.0,pcie=1
hostpci2: 00:1d.0,pcie=1
hostpci3: 82:00.0,pcie=1
hostpci4: 81:00.0,pcie=1
# hostpci5: 0a:00.0,pcie=1
hugepages: 1024
machine: pc-q35-6.1
memory: 40960
name: Monterey
net0: vmxnet3=2B:F9:52:54:FE:8A,bridge=vmbr0
numa: 1
onboot: 1
ostype: other
scsihw: virtio-scsi-pci
smbios1: uuid=42c28f01-4b4e-4ef8-97ac-80dea43c0bcb
sockets: 2
tablet: 0
vga: none
hookscript: local:snippets/hackintosh.sh
- agent
- Enabling the agent enables Proxmox’s “shutdown” button to ask macOS to perform an orderly shutdown.
- args
- OpenCore now allows “cpu” to be set to “host” to pass through all supported CPU features automatically. The OC config causes the CPU to masquerade as Penryn to macOS to keep macOS happy.
- I’m passing through all 32 of my host threads to macOS. Proxmox’s configuration format doesn’t natively support setting a thread count, so I had to add my topology manually here by adding “-smp 32,sockets=2,cores=8,threads=2”.
- For an explanation of all that “-device” stuff on the end, read the “net0” section below.
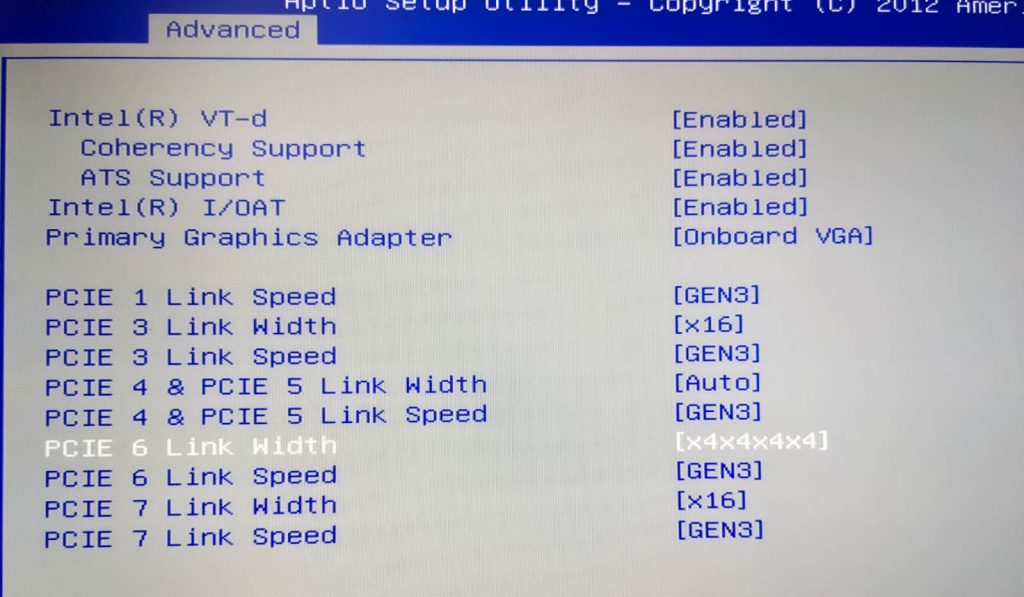
- hostpci0-5
- I’m passing through 6 PCIe devices, which is now natively supported by the latest version of Proxmox 6. From first to last I have my graphics card, two USB 2 controllers, my NVMe storage, a USB 3 controller, and one gigabit network card.
- hugepages
- I’ve enabled 1GB hugepages on Proxmox, so I’m asking for 1024MB hugepages here. More details on that further down.
- memory
- 40 gigabytes, baby!
- net0
- I usually have this emulated network card disabled in Monterey’s network settings, and use my passthrough Intel 82574L instead.
- Although Monterey has a driver for the Intel 82574L, the driver doesn’t match the exact PCI ID of the card I have, so the driver doesn’t load and the card remains inactive. Luckily we can edit the network card’s PCI ID to match what macOS is expecting. Here’s the card I’m using
-
# lspci -nn | grep 82574L

0b:00.0 Ethernet controller [0200]: Intel Corporation 82574L Gigabit Network Connection [8086:10d3]
My PCI ID here is 8086:10d3. If you check the file /System/Library/Extensions/IONetworkingFamily.kext/Contents/PlugIns/Intel82574L.kext/Contents/Info.plist, you can see the device IDs that macOS supports with this driver:
<key>IOPCIPrimaryMatch</key>
<string>0x104b8086 0x10f68086</string>
<key>IOPCISecondaryMatch</key>
<string>0x00008086 0x00000000</string>
Let’s make the card pretend to be that 8086:10f6 (primary ID) 0000:0000 (sub ID) card. To do this we need to edit some hostpci device properties that Proxmox doesn’t support, so we need to move the hostpci device’s definition into the “args” where we can edit it.
First make sure the hostpci entry for the network card in the VM’s config is the one with the highest index, then run
qm showcmd <your VM ID> --pretty. Find the two lines that define that card:...
-device 'pcie-root-port,id=ich9-pcie-port-6,addr=10.1,x-speed=16,x-width=32,multifunction=on,bus=pcie.0,port=6,chassis=6' \
-device 'vfio-pci,host=0000:0a:00.0,id=hostpci5,bus=ich9-pcie-port-6,addr=0x0' \
...Copy those two lines, remove the trailing backslashes and combine them into one line, and add them to the end of your “args” line. Now we can edit the second -device to add the fake PCI IDs (new text in bold):
-device 'pcie-root-port,id=ich9-pcie-port-6,addr=10.1,x-speed=16,x-width=32,multifunction=on,bus=pcie.0,port=6,chassis=6' -device 'vfio-pci,host=0000:0a:00.0,id=hostpci5,bus=ich9-pcie-port-6,addr=0x0,x-pci-device-id=0x10f6,x-pci-sub-vendor-id=0x0000,x-pci-sub-device-id=0x0000'
Now comment out the “hostpci5” line for the network card, since we’re manually defining it through the args instead. Now macOS should see this card’s ID as if it was one of the supported cards, and everything works!
- vga
- I need to set this to “none”, since otherwise the crappy emulated video card would become the primary video adapter, and I only want my passthrough card to be active.
-
- hookscript
- This is a new feature in Proxmox 5.4 that allows a script to be run at various points in the VM lifecycle.
- In recent kernel versions, some devices like my USB controllers are grabbed by the host kernel very early during boot, before vfio can claim them. This means that I need to manually release those devices in order to start the VM. I created /var/lib/vz/snippets/hackintosh.sh with this content (and marked it executable with chmod +x):
-
#!/usr/bin/env bash

if [ "$2" == "pre-start" ]
then
# First release devices from their current driver (by their PCI bus IDs)
echo 0000:00:1d.0 > /sys/bus/pci/devices/0000:00:1d.0/driver/unbind
echo 0000:00:1a.0 > /sys/bus/pci/devices/0000:00:1a.0/driver/unbind
echo 0000:81:00.0 > /sys/bus/pci/devices/0000:81:00.0/driver/unbind
echo 0000:82:00.0 > /sys/bus/pci/devices/0000:82:00.0/driver/unbind
echo 0000:0a:00.0 > /sys/bus/pci/devices/0000:0a:00.0/driver/unbind

# Then attach them by ID to VFIO
echo 8086 1d2d > /sys/bus/pci/drivers/vfio-pci/new_id
echo 8086 1d26 > /sys/bus/pci/drivers/vfio-pci/new_id
echo 1b73 1100 > /sys/bus/pci/drivers/vfio-pci/new_id
echo 144d a802 > /sys/bus/pci/drivers/vfio-pci/new_id
echo vfio-pci > /sys/bus/pci/devices/0000:0a:00.0/driver_override
echo 0000:0a:00.0 > /sys/bus/pci/drivers_probe
fi
Guest file storage
The macOS VM’s primary storage is the passthrough Samsung 970 Evo 1TB NVMe SSD, which can be installed onto and used in Monterey. However since Monterey TRIM is broken, and SetApfsTrimTimeout needs to be set in my config.plist to disable it so it doesn’t slow down boot.
For secondary storage, my Proxmox host exports a number of directories over the AFP network protocol using netatalk.
Proxmox 5
Debian Stretch’s version of the netatalk package is seriously out of date (and I’ve had file corruption issues with old versions), so I installed netatalk onto Proxmox from source instead following these directions:
http://netatalk.sourceforge.net/wiki/index.php/Install_Netatalk_3.1.11_on_Debian_9_Stretch
My configure command ended up being:
./configure --with-init-style=debian-systemd --without-libevent --without-tdb --with-cracklib --enable-krbV-uam --with-pam-confdir=/etc/pam.d --with-dbus-daemon=/usr/bin/dbus-daemon --with-dbus-sysconf-dir=/etc/dbus-1/system.d --with-tracker-pkgconfig-version=1.0
Netatalk is configured in /usr/local/etc/afp.conf like so:
; Netatalk 3.x configuration file

[Global]

[Downloads]
path = /tank/downloads
rwlist = nick ; List of usernames with rw permissions on this share

[LinuxISOs]
path = /tank/isos
rwlist = nick
When connecting to the fileshare from macOS, you connect with a URL like “afp://proxmox”, then specify the name and password of the unix user you’re authenticating as (here, “nick”), and that user’s account will be used for all file permissions checks.
Proxmox 7
Proxmox 7’s prebuilt version of Netatalk is good now, so I backed up my afp.conf, removed my old version that was installed from source (with “make uninstall”, note that this erases afp.conf!), and apt-installed the netatalk package instead. The configuration is now found at /etc/netatalk/afp.conf.
Proxmox configuration
Passthrough of PCIe devices requires a bit of configuration on Proxmox’s side, much of which is described in their manual. Here’s what I ended up with:
/etc/default/grub
...
GRUB_CMDLINE_LINUX_DEFAULT="quiet intel_iommu=on rootdelay=10"
...
Note that Proxmox 7 will be booted using systemd-boot rather than GRUB if you are using a ZFS root volume and booting using UEFI. If you’re using systemd-boot you need to create this file instead:
/etc/kernel/cmdline (Proxmox 7 when using systemd-boot)
root=ZFS=rpool/ROOT/pve-1 boot=zfs intel_iommu=on rootdelay=10
/etc/modules
vfio
vfio_iommu_type1
vfio_pci
vfio_virqfd
/etc/modprobe.d/blacklist.conf
blacklist nouveau
blacklist nvidia
blacklist nvidiafb
blacklist snd_hda_codec_hdmi
blacklist snd_hda_intel
blacklist snd_hda_codec
blacklist snd_hda_core
blacklist radeon
blacklist amdgpu
/etc/modprobe.d/kvm.conf
options kvm ignore_msrs=Y
/etc/modprobe.d/kvm-intel.conf
# Nested VM support
options kvm-intel nested=Y
/etc/modprobe.d/vfio-pci.conf
options vfio-pci ids=144d:a802,8086:1d2d,8086:1d26,10de:1c03,10de:10f1,10de:1380,1b73:1100,1002:6798,1002:aaa0 disable_vga=1
# Note that adding disable_vga here will probably prevent guests from booting in SeaBIOS mode
After editing those files you typically need to run update-grub (or pve-efiboot-tool refresh if you are using systemd-boot on Proxmox 7), update-initramfs -k all -u, then reboot Proxmox.
Host configuration
In the UEFI settings of my host system I had to set my onboard video card as my primary video adapter. Otherwise, the VBIOS of my discrete video cards would get molested by the host during boot, rendering them unusable for guests (this is especially a problem if your host boots in BIOS compatibility mode instead of UEFI mode).
One way to avoid needing to change this setting (e.g. if you only have one video card in your system!) is to dump the unmolested VBIOS of the card while it is attached to the host as a secondary card, then store a copy of the VBIOS as a file in Proxmox’s /usr/share/kvm directory, and provide it to the VM by using a “romfile” option like so:
hostpci0: 01:00,x-vga=on,romfile=my-vbios.bin
Or if you don’t have a spare discrete GPU of your own to achieve this, you can find somebody else who has done this online. However, I have never tried this approach myself.
Guest configuration
In Catalina, I have system sleep turned off in the power saving options (because I had too many instances where it went to sleep and never woke up again).
Launching the VM
I found that when I assign obscene amounts of RAM to the VM, it takes a long time for Proxmox to allocate the memory for it, causing a timeout during VM launch:
start failed: command '/usr/bin/kvm -id 100 ...'' failed: got timeout
You can instead avoid Proxmox’s timeout system entirely by running the VM like:
qm showcmd 100 | bash
Another RAM problem comes if my host has done a ton of disk IO. This causes ZFS’s ARC (disk cache) to grow in size, and it seems like the ARC is not automatically released when that memory is needed to start a VM (maybe this is an interaction with the hugepages feature). So the VM will complain that it’s out of memory on launch even though there is plenty of memory marked as “cache” available.
You can clear this read-cache and make the RAM available again by running:
echo 3 > /proc/sys/vm/drop_caches
1GB hugepages
My host supports 1GB hugepages:
# grep pdpe1gb /proc/cpuinfo

... nx pdpe1gb rdtsc ...
So I added this to the end of my /etc/kernel/cmdline to statically allocate 40GB of 1GB hugepages on boot:
default_hugepagesz=1G hugepagesz=1G hugepages=40
After running update-initramfs -u and rebooting, I can see that those pages have been successfully allocated:
# grep Huge /proc/meminfo

HugePages_Total: 40
HugePages_Free: 40
HugePages_Rsvd: 0
HugePages_Surp: 0
Hugepagesize: 1048576 kB
Hugetlb: 41943040 kB
It turns out that those hugepages are evenly split between my two NUMA nodes (20GB per CPU socket), so I have to set “numa: 1” in the VM config.
The final step is to add “hugepages: 1024” to the VM’s config file so it will use those 1024MB hugepages. Otherwise it’ll ignore them completely and continue to allocate from the general RAM pool, which will immediately run me out of RAM and cause the VM launch to fail. Other VMs won’t be able to use that memory, even if macOS isn’t running, unless they’re also configured to use 1GB hugepages.
You can also add “+pdpe1gb” to the list of the VM’s CPU features so that the guest kernel can use 1GB pages internally for its own allocations, but I doubt that MacOS takes advantage of this feature.
Notes
2019-12-19
Upgraded to 1GB hugepages. Proxmox 6.1 and macOS 10.15.2.
2019-03-29
My VM was configured with a passthrough video card, and the config file also had “vga: std” in it. Normally if there is a passthrough card enabled, Proxmox disables the emulated VGA adapter, so this was equivalent to “vga: none”. However after upgrading pve-manager to 5.3-12, I found that the emulated vga adapter was re-enabled, so OpenCore ended up displaying on the emulated console, and both of my hardware monitors became “secondary” monitors in macOS. To fix this I needed to explicitly set “vga: none” in the VM configuration.
2019-04-12
Added “hookscript” to take advantage of new Proxmox 5.4 features
2019-07-18
Did an in-place upgrade to Proxmox 6 today!
Proxmox 6 now includes an up-to-date version of the netatalk package, so I use the prebuilt version instead of building it from source. Don’t forget to install my new patched pve-edk2-firmware package.
2020-03-27
I upgraded to macOS 10.15.4, but even after updating Clover, Lilu and WhateverGreen, my R9 280X only gives me a black screen, although the system does boot and I can access it using SSH. Looking at the boot log I can see a GPU restart is attempted, but fails. Will update with a solution if I find one.
EDIT: For the moment I built an offline installer ISO using a Catalina 10.15.3 installer I had lying around, and used that to reinstall macOS. Now I’m back on 10.15.3 and all my data is exactly where I left it, very painless. After the COVID lockdown I will probably try to replace my R9 280X with a better-supported RX 570 and try again.
2020-04-27
Updated to OpenCore instead of Clover. Still running 10.15.3. pve-edk2-firmware no longer needs to be patched when using OpenCore!
2020-06-05
Replaced my graphics card with an RX 580 to get 10.15.5 compatibility, and I’m back up and running now. Using a new method for fixing my passthrough network adapter’s driver which avoids patching Catalina’s drivers.
2020-12-03
Added second NVMe SSD and 4x SSD carrier card
2021-07-07
Upgraded from 2x E5-2670 to 2x E5-2687W v2. Fusion 360 is now 30% faster! Added photos of my rig
2021-07-10
Updated to Proxmox 7, and Hackintosh is running fine without any tweaks
2021-12-23
For some reason by network adapter no longer wants to bind to vfio-pci using “new_id”, I had to use the “driver_override” approach instead in my hookscript snippet (updated above).
Hi Nick!
Thanks for all the posts about ProxMox. You mentioned you use Davinci Resolve via ProxMox. How is your experience using Resolve via Proxmox vs on the host computer natively?
Sorry, I’ve never used it natively on this hardware so I can’t compare.
Hi Nick, thank you for all your hard work and support. You are a legend.
I have followed one of your suggestions and passed through an nvme drive to a ventura vm (fresh install from recovery). Everything installed well. Only my system drive has an external drive icon (orange) and not a hard drive icon. Does it matter at all for anything into future? In diskutil the nvme is shown as PCI-Express External Physical Disk • GUID Partition Map. I believe I followed all your instructions around formatting it before installing Ventura on it. Thank you in advance
I don’t think this has any negative impact.
I think you can look up the device’s path using Hackintool, and then add an Internal device property to that path in OpenCore to mark it as internal, but I can’t find the tutorial I saw before.
Thank you Nick. I will take on the search and will post if successful, in case anyone has the same issue.
Hi Nick,
Just wanted to get back on the topic of external physical disk. There are two options that I found that have worked for other people: 1. Innie (https://github.com/cdf/Innie) … which should be a very simple and fast solution, and 2. Adding an additional key ‘built-in’ with value of ‘01000000’ or ‘00000001’ to the drive itself in EFI config.plist. Both of which have not worked for me unfortunately. But maybe someone else gets more lucky.
I left this trouble shoot for now to find a solution for a more important one. I am trying to figure out why my USB pass-through doesn’t work for the latest OpenCore19 and Ventura install. Proxmox has no problem passing through any of my USB ports or devices to other VM’s, just not to this one. My first thought was something is missing in the OpenCore package, a kext or something. But from my understanding everything that is there should inject all connected USB as USB2.0. Am I wrong?
When I pass through USB peripherals like keyboard and mouse, I turn off the option ‘Use tablet for pointer’.
My args for this VM are the same as per your instructions, only with ‘Haswell-noTSX’ for the cpu.
args: -device isa-applesmc,osk=“THE-OSK-YOU-EXTRACTED-GOES-HERE” -smbios type=2 -device usb-kbd,bus=ehci.0,port=2 -global nec-usb-xhci.msi=off -global ICH9-LPC.acpi-pci-hotplug-with-bridge-support=off -cpu Haswell-noTSX,vendor=GenuineIntel,+invtsc,+hypervisor,kvm=on,vmware-cpuid-freq=on
Can you please give me a hint where I could start looking to fix this issue? Much appreciated in advance!
Hi Nick, thanks a lot for sharing this with us. I have proxmox 7.4 and I’m trying to passthrough my rx570 gpu to q35 machine with OC 0.9.1 running Ventura 13.3.1 Everything works fine when I attach a default vga to the machine along with the gpu. In this case (as you mentioned earlier in this article) proxmox uses this vga as a primary adaper and all booting process is displayed on it. rx570 card is initialized by macos during bootup and in the end I see Ventura login screen on a monitor attached to the gpu, can login and work.
However, if I try to leave rx570 alone in the machine configuration, I even don’t see a proxmox logo on a monitor attached to gpu. I took a log of the boot process in this case via serial port attached to the machine config and it turned out GOP is not detected by the system.
I see this in the log:
OCFB: No GOP protocols for FB info, ignoring
OCC: Missing compatible GOP – Not Found
OCC: Missing GOP on ConOut – Unsupported
and finally
OC: Boot failed – Aborted
and OC returns back the the boot selection menu.
I tried to configure the machine with and without romfile, no difference.
I thought that my vbios doesn’t have uefi part, but it has. I’ve found this thread about very similar problem
https://www.reddit.com/r/macOSVMs/comments/u1ex30/hackintosh_gpu_passthrough_problems_on_proxmox/
and a workaround proposed by reinstalling proxmox with CSM disabled in the bios. I’m not sure if CSM was enabled or disabled during proxmox installation in my case, but at the moment it is definitely disabled. May be you have some thoughts on how to fix this problem without reinstalling proxmox?
Thank you, Dmitry
Most likely your host is failing to pass through the GPU’s vBIOS to the guest, in the host “dmesg” output check for “BAR” errors after guest launch.
No need to look at OpenCore at all, since passthrough has already failed before OpenCore starts loading. Successful passthrough requires that the Proxmox logo appears at the start of guest boot, because this indicates that the guest UEFI was able to init the card.
Here is my dmesg|grep -i bar output collected after vm has started :
root@pve-asrock:~# dmesg |grep -i bar
[ 0.088029] Booting paravirtualized kernel on bare hardware
[ 0.242091] Spectre V1 : Mitigation: usercopy/swapgs barriers and __user pointer sanitization
[ 0.242102] Spectre V2 : mitigation: Enabling conditional Indirect Branch Prediction Barrier
[ 0.475602] pci 0000:00:02.0: BAR 2: assigned to efifb
[ 0.475638] pci 0000:00:02.0: VF(n) BAR0 space: [mem 0x00000000-0x06ffffff 64bit] (contains BAR0 for 7 VFs)
[ 0.475645] pci 0000:00:02.0: VF(n) BAR2 space: [mem 0x00000000-0xdfffffff 64bit pref] (contains BAR2 for 7 VFs)
[ 0.521054] pci 0000:00:1f.5: can’t claim BAR 0 [mem 0xfe010000-0xfe010fff]: no compatible bridge window
[ 0.534442] pnp 00:03: disabling [mem 0xc0000000-0xcfffffff] because it overlaps 0000:00:02.0 BAR 9 [mem 0x00000000-0xdfffffff 64bit pref]
[ 0.546664] pci 0000:00:02.0: BAR 9: assigned [mem 0x4020000000-0x40ffffffff 64bit pref]
[ 0.546668] pci 0000:00:02.0: BAR 7: assigned [mem 0x4010000000-0x4016ffffff 64bit]
[ 0.546672] pci 0000:00:15.0: BAR 0: assigned [mem 0x4017000000-0x4017000fff 64bit]
[ 0.546736] pci 0000:00:1f.5: BAR 0: assigned [mem 0x70e04000-0x70e04fff]
[ 1.304701] ata5: SATA max UDMA/133 abar m2048@0x70e02000 port 0x70e02300 irq 127
[ 1.304705] ata6: SATA max UDMA/133 abar m2048@0x70e02000 port 0x70e02380 irq 127
[ 1.304710] ata7: SATA max UDMA/133 abar m2048@0x70e02000 port 0x70e02400 irq 127
[ 1.304714] ata8: SATA max UDMA/133 abar m2048@0x70e02000 port 0x70e02480 irq 127
root@pve-asrock:~#
No traces of errors. And according to timestamp all records relate to initial boot time.
And no errors at all in dmesg:
root@pve-asrock:~# dmesg |grep -i error
[ 1.167570] RAS: Correctable Errors collector initialized.
This is all I have regarding errors in dmesg.
I also supposed that host is failing to pass through the GPU’s vBIOS to the guest. That’s why I tried to start my vm with rombar= option. This didn’t help either and I concluded, that the problem sits somewhere else.
2 more thoughts.
1. As far as there are no BAR related errors in dmesg, may be these conditions is not an error at all from host’s point of view. In this case the difference between poxmox systems being installed with CSM enabled and CSM disabled BIOS would produce difference only in linux kernel boot parameters. In my case cmdline looks like this:
root@pve-asrock:~# cat /proc/cmdline
root=UUID=d964c6c7-d74e-4479-b0b3-c4005a7f5c48 cryptdevice=UUID=3fe34684-cabe-4f39-86b8-8959921e4656:nvme0n1p3_crypt ro add_efi_memmap net.ifnames=0 biosdevname=0 intel_iommu=on iommu=pt video=efifb:off video=simplefb:off video=vesafb:off split_lock_detect=off i915.enable_guc=7
root@pve-asrock:~#
May be to make passthrough work right way I need another kernel boot parameters?
2. As far as the same guest vm with windows boots and works fine without vga and with gpu only, this means that windows booter can continue booting even if there is no suitable display in the system detected by uefi. May be there a way to make OC to boot the system in the same case?
No, in this case this is due to the host wrecking the shadow copy of the vBIOS in RAM, leaving it unsuitable for the guest to use to init the GPU. Supply a fresh copy using the romfile argument on the hostpci line.
No, macOS requires UEFI to init the card before it starts booting. If your Windows VM doesn’t show the Proxmox boot logo, it is broken too, but resets the card itself using its AMD GPU guest drivers.
>> Supply a fresh copy using the romfile argument on the hostpci line.
I have this in my vm config:
hostpci0: 0000:03:00,pcie=1,x-vga=1,romfile=Biostar.RX570.8GB.1002-67DF.rom
This rom file I manualy flashed to the card, so it is definitely consistent. However it does not help to init the card by ovmf.
Is there any way to check what exactly is wrong with the graphics init process in ovmf? Or what is wrong with the card from the host point of view?
> No, macOS requires UEFI to init the card before it starts booting.
I switched my LG TV, connected to the AMD GPU via DP2HDMI cable to a HP monitor connected via the same cable to the same GPU port and now OVMF recognized this monitor and OC started the macos without vga in guest config. Now question is how to make ovmf to recognize my TV or how to make OC to boot macos headless?
I was looking at what you did for you network card. I have my gpu passed through, but do not have any audio. Could I add the below to my args and change the function code to get the audio to work?
-device vfio-pci,host=0000:03:00.0,id=hostpci0.0,bus=pci.0,addr=0x10.0,multifunction=on,vfio-pci,host=0000:03:00.1,id=hostpci0.1,bus=pci.0,addr=0x10.1
You only need to tick “all functions” on the passthrough to pass both the .0 and .1 devices together.
I have done that still not getting any audio through HDMI. In system information it shows no audio devices and none connected in system preferences.
Hi Nick,
I hope this message finds you well. I am trying to find out why my USB pass-through doesn’t work for the latest OpenCore19 and Ventura install. Proxmox has no problem passing through any of my USB ports or devices to other VM’s, just not to this one. My first thought was something is missing in the OpenCore package, a kext or something. But from my understanding everything that is there should inject all connected USB as USB2.0. Am I wrong?
My args for this VM are the same as per your instructions, only with ‘Haswell-noTSX’ for the cpu.
Any hint would be greatly appreciated. Thank you in advance.
Hello Nick
Thank you for your site, it’s really great what you share 😀
Do you have an idea how to recognize the iGPU HD 630 on the VM Ventura 13.4? with opencore?
Another thing, when I create my VM, if I put “host” processor 1 sockets and 6 cores, the VM starts but remains blocked on the apple.
If I put “host” 1 sockets and 4 cores, the installation starts.
It’s strange because my processor is an intel i5 8400.
For Windows VM I do the same thing is everything works.
Do you have an idea ?
Thank you.
iGPU passthrough requires a custom vBIOS, I have not attempted it:
https://github.com/vivekmiyani/OSX_GVT-D
The core count must be a power of two. To pass 6 cores, set socket count to 3 and cores to 2.
Hello!
I would like to ask for some help/advice before I go any further.
I’m sorry if I ask a little basic (llama) questions and descriptions, but I couldn’t get information about them elsewhere.
They installed a macosx (ventura) operating system for me within 1 proxmox (I haven’t used it so far) based on your description.
I connect to the system with real/tight vnc, the connection is established, but the system is quite slow.
Here in the description it is stated that if we add a intact separate video card to macosx, the system will provide performance/speed similar to the real original.
For VGA there is 1 long list with RX 550.
I plan to purchase the following card for it (in principle, Baffin core):
Sapphire RX 550 2GB GDDR5
I would like to ask if I will get better performance with the card to be purchased (would the op system be used for daily use)?
Also, in the future, the VGA card will be included in the machine, so if I stop macOS, I can also stop VGA with it (optimization of energy consumption).
Thank you in advance for any help.